
How to create a Google Ads conversion & find your Conversion ID & Label
The Google Ads destination needs two values: a Conversion ID and a Conversion Label. Both come from a conversion action set up to use Google Tag Manager. If you have not created a conversion action yet, follow the full walkthrough below.
Create a Google Ads conversion action
- Go to ads.google.com and sign in.
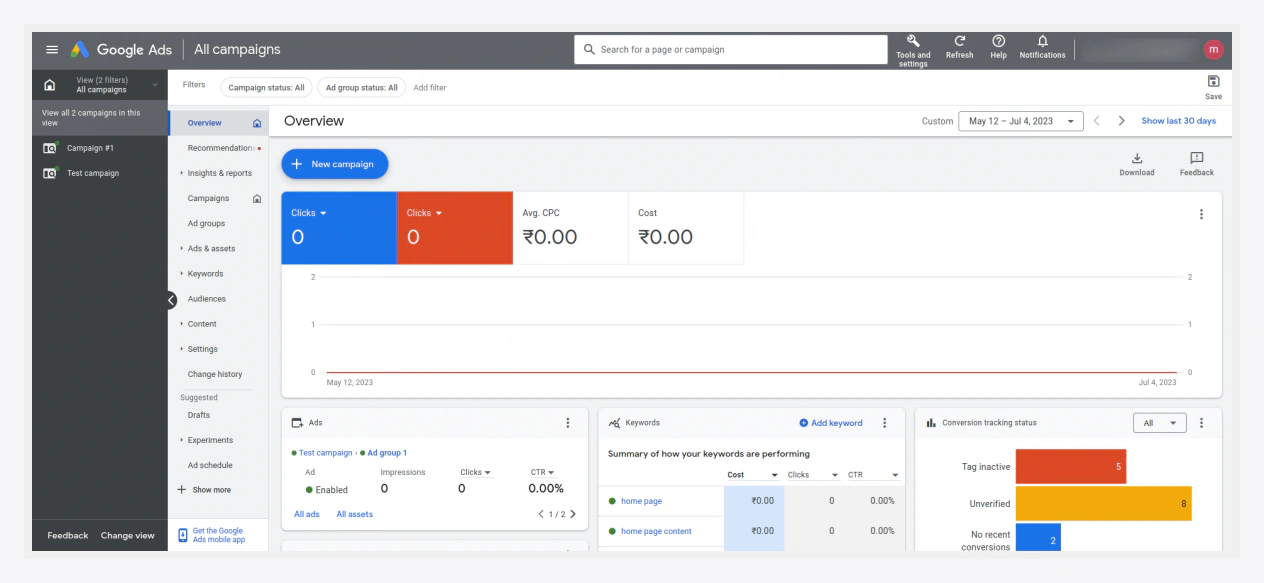
- Click Tools and settings in the top navigation.
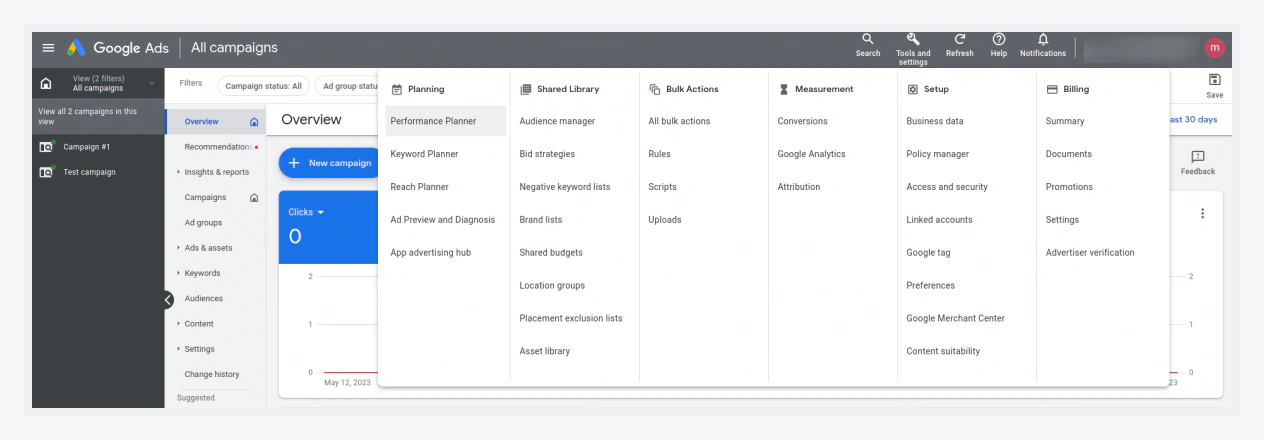
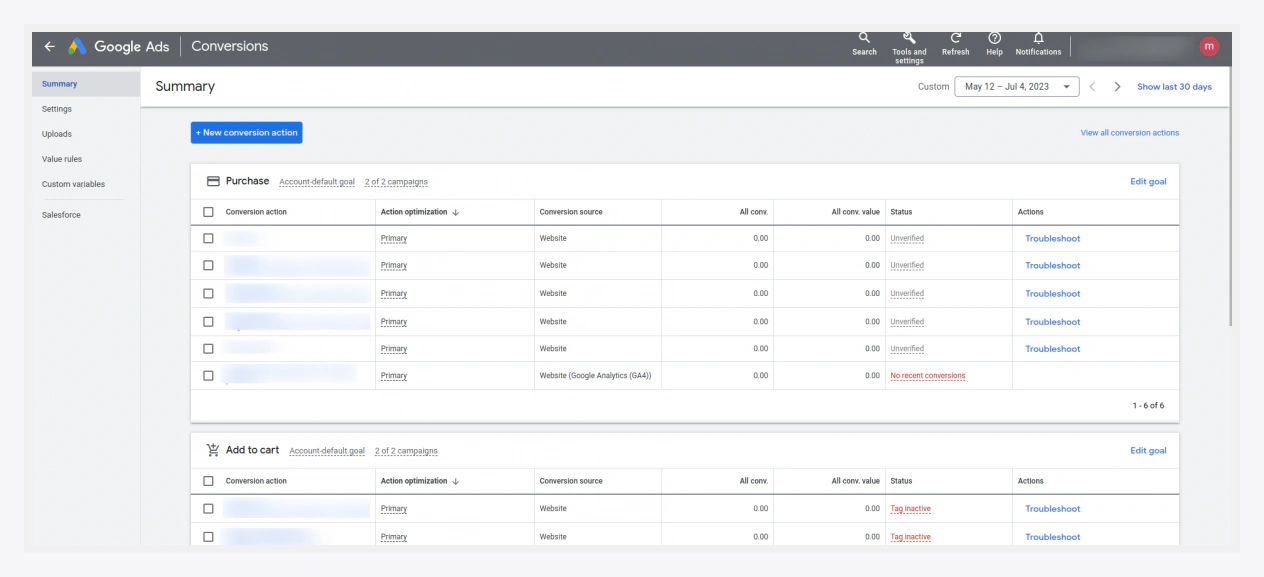
- Open Conversions and click Add conversion (+ New conversion action).
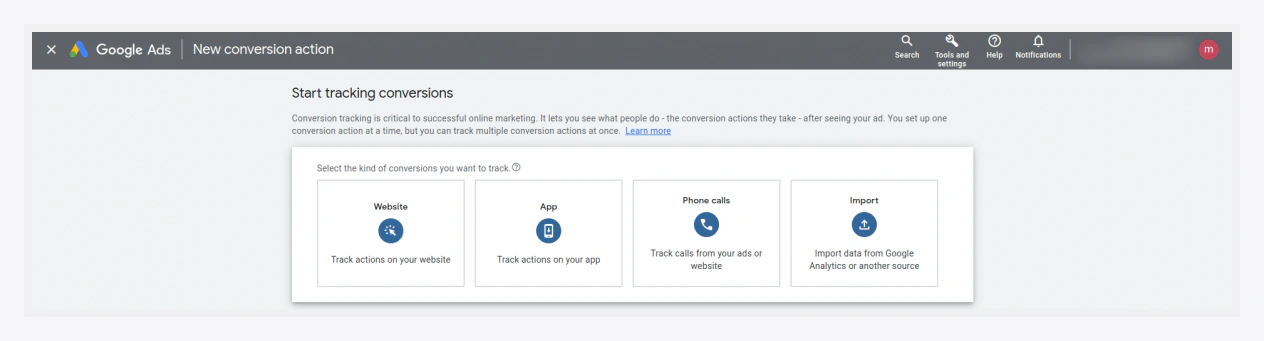
- Choose Website as the conversion source.
- Enter your store's domain name and continue.
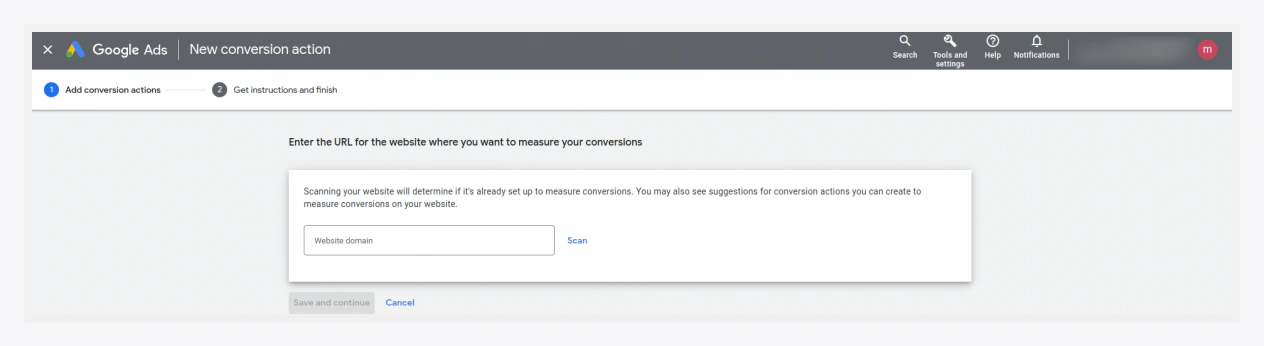
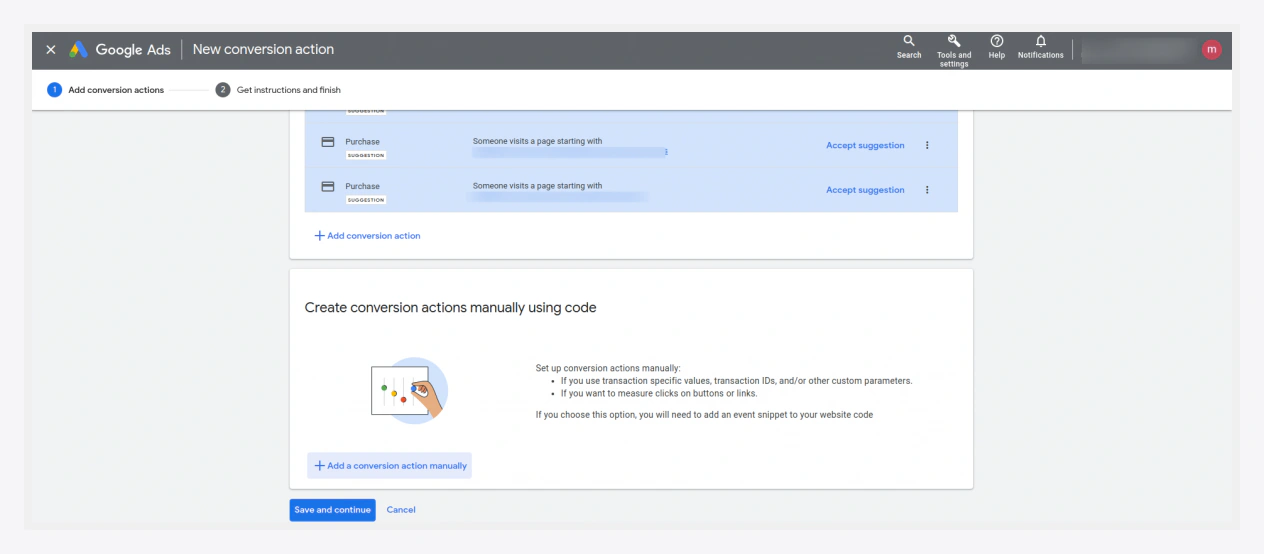
- Click Add a conversion action manually so you can wire it to Google Tag Manager.
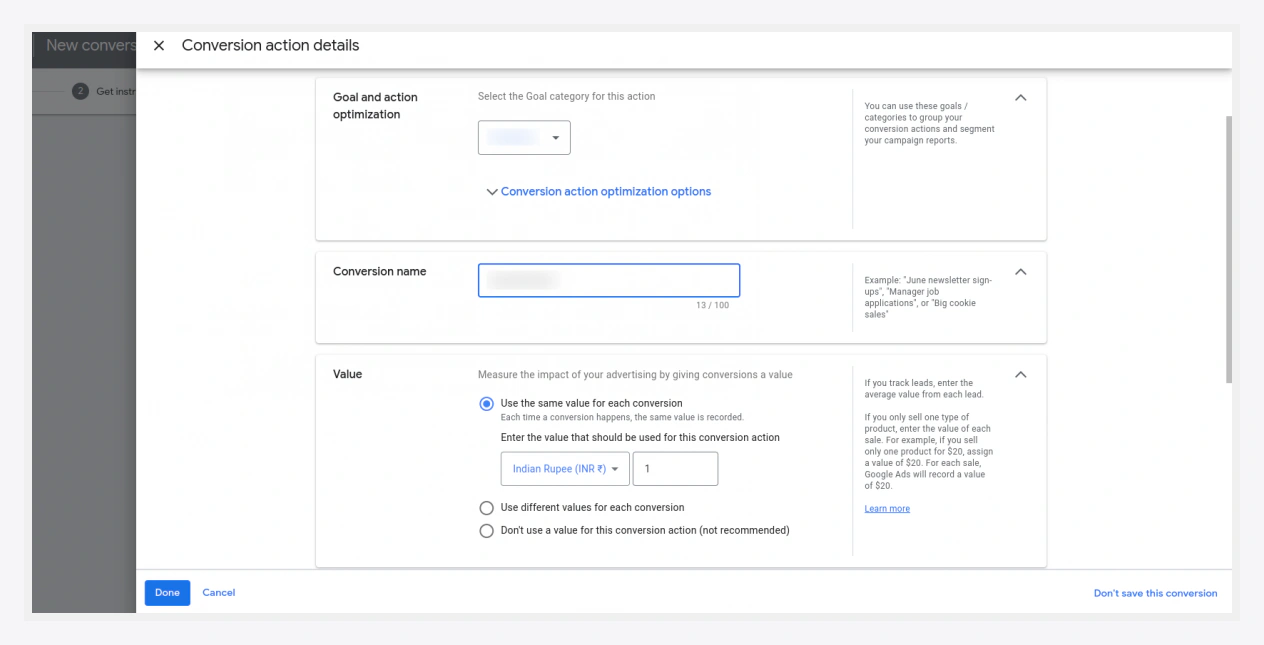
- Fill in the conversion details (name, category, value, counting), then click Done.
- Click Save and continue, then Done.
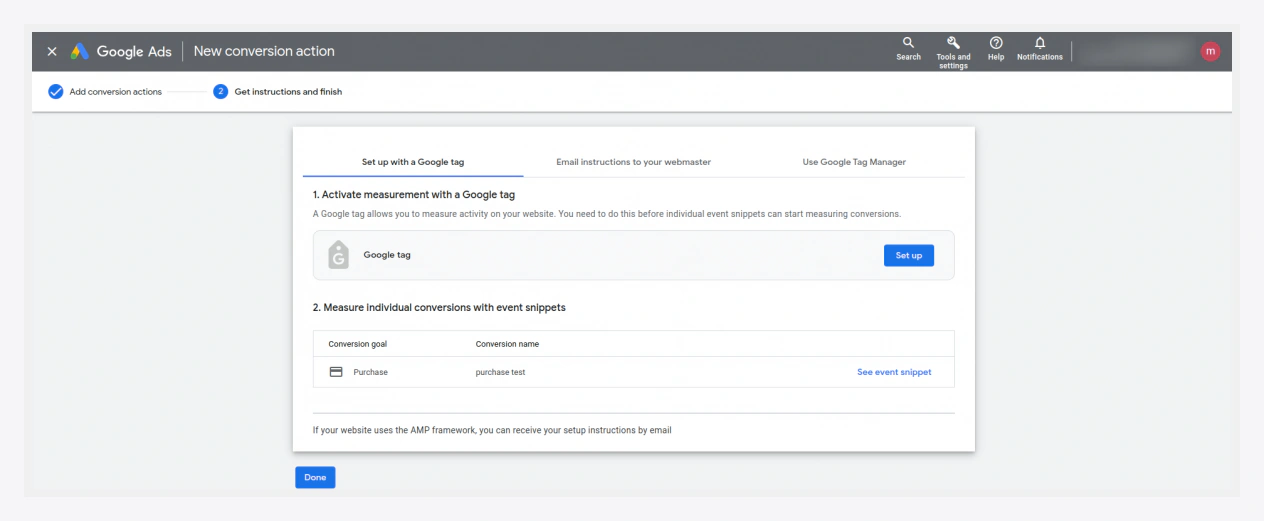
- Your new conversion action now appears in the list. Open it.
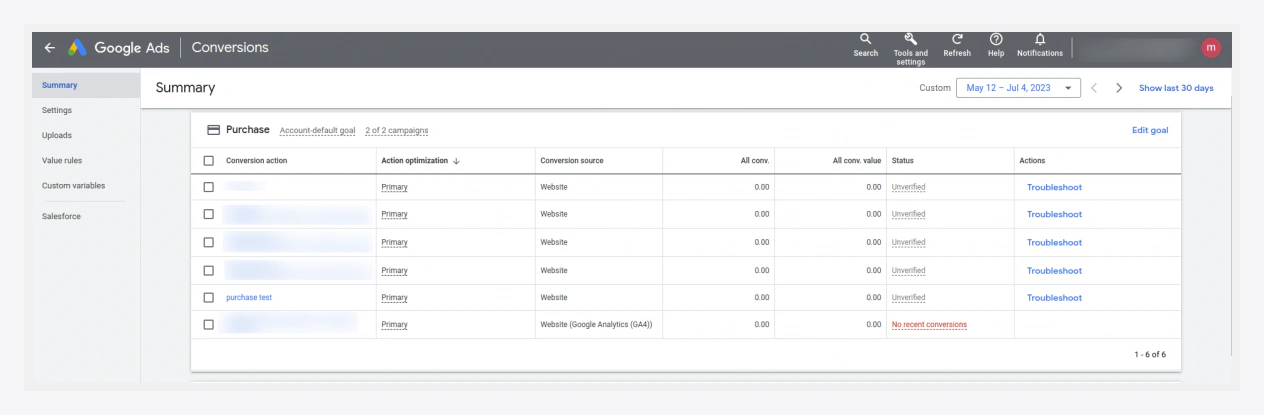
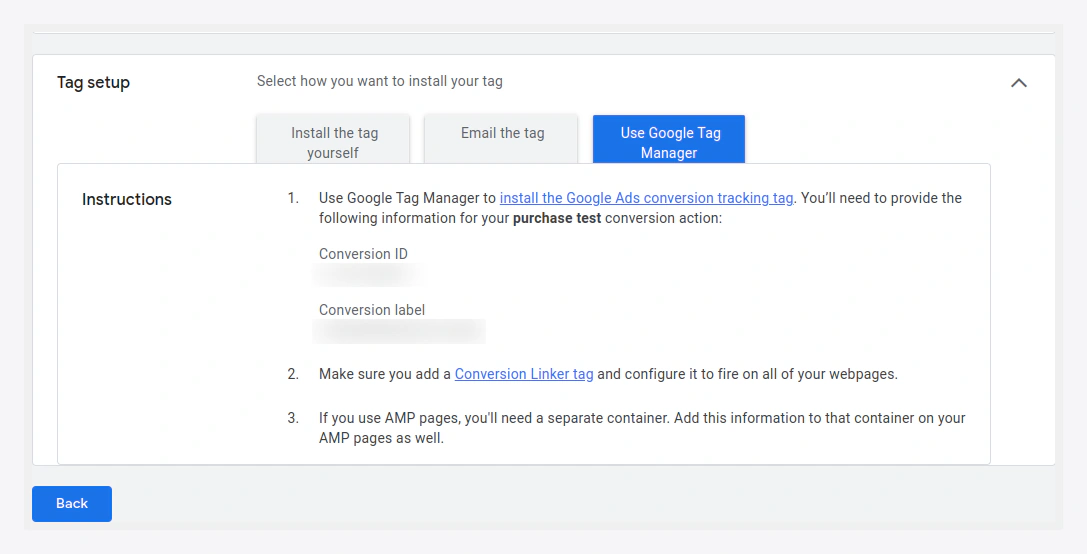
- Expand Tag setup and choose Use Google Tag Manager. Google Tag Manager shows the two values you need:
- Conversion ID — a numeric value, sometimes shown prefixed with
AW-. - Conversion Label — a short alphanumeric string.
- Conversion ID — a numeric value, sometimes shown prefixed with
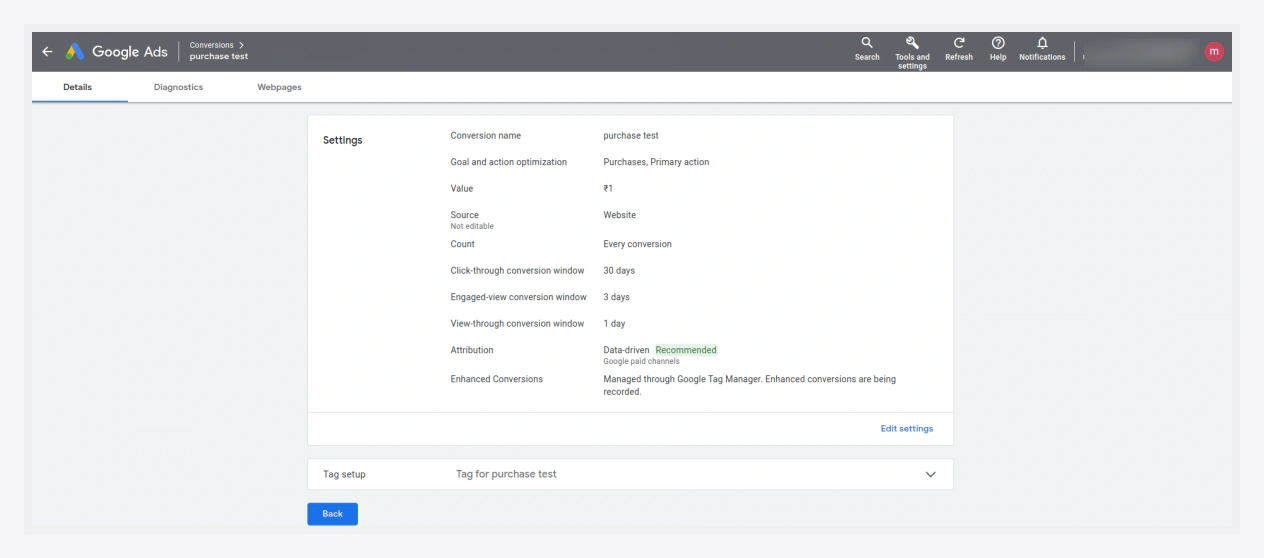
Finding the IDs again later
Reopen the conversion action any time and expand Tag setup → Use Google Tag Manager to see the Conversion ID and Label again.
Where they go
Enter both in Destinations → Google Ads:
| Google Ads value | Extension field |
|---|---|
| Conversion ID | Conversion ID |
| Conversion Label | Conversion Label |
On container export, these are wired into the Google Ads conversion tag, which fires on payment_completed.
Dynamic remarketing (optional)
For dynamic remarketing, also enable it in the Google Ads group and enter your Merchant Center ID. Make sure the product identifier (SKU vs numeric ID) matches your Merchant Center feed — see Data Tuning.
Verify conversions
Place a test order in GTM Preview mode and confirm the Google Ads conversion tag fires. In Google Ads, the conversion action status moves to Recording conversions once it receives data (this can take a few hours).