
Meta Pixel
Enable the Meta Pixel destination to have Guided Setup wire Meta (Facebook) Pixel tags into your exported container, mapped from the storefront's neutral events.
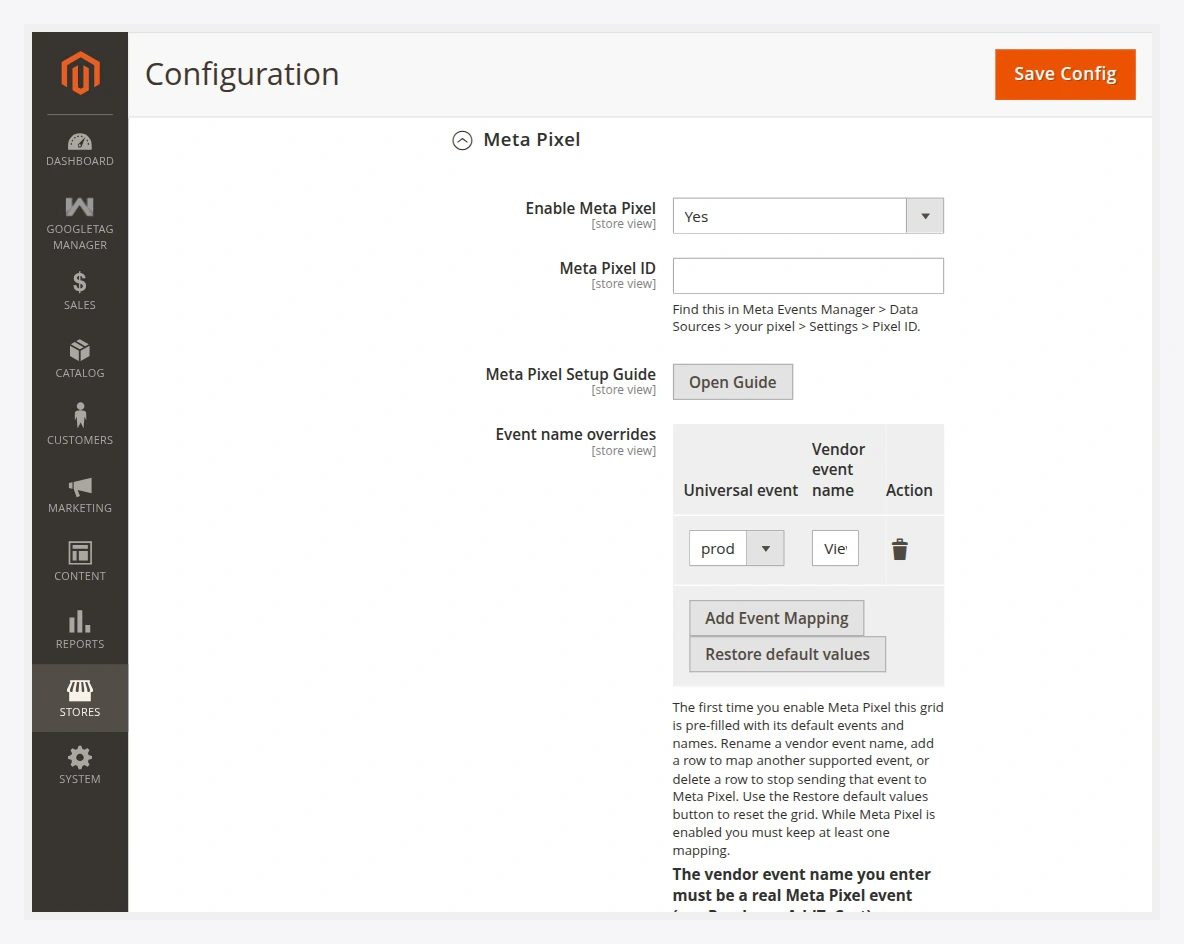
Fields
| Field | Description |
|---|---|
| Enable Meta Pixel | Turns the Meta Pixel destination on for Guided Setup. |
| Meta Pixel ID | Your pixel ID. Find it in Meta Events Manager → Data Sources → your pixel → Settings → Pixel ID. See how to find it. |
| Meta Pixel Setup Guide | An in-Admin button that walks you through pixel setup. |
| Event name overrides | Maps neutral storefront events to Meta Pixel event names. Pre-filled with Meta defaults on first enable. |
Default event mapping
| Storefront event | Meta Pixel event |
|---|---|
product_viewed | ViewContent |
product_list_viewed | ViewContent |
search_performed | Search |
cart_item_added | AddToCart |
wishlist_item_added | AddToWishlist |
checkout_started | InitiateCheckout |
payment_selected | AddPaymentInfo |
customer_registered | CompleteRegistration |
payment_completed | Purchase |
Rename any of these in the Event name overrides grid, add mappings for other supported events, or delete a row to stop sending it to Meta.
Real Meta events only
The Meta Pixel event name you enter must be a real Meta event (for example Purchase, AddToCart). A name Meta does not recognise is dropped. Keep at least one mapping while Meta Pixel is enabled.
Frontend event tracking
Once the pixel tag is wired and the container imported, Meta events fire from the browser on real shopper actions. Confirm them with the Meta Pixel Helper browser extension or in Events Manager → Test Events. See Verify events.
Next
- Export the container and import it into GTM.
- Verify events.