
Activate & Connect
After installation, open the Admin and connect the extension to your Google Tag Manager container. This is the minimum needed to start pushing events to the dataLayer.
Open the configuration
Go to Stores → Configuration → Webkul → Google Tag Manager Configuration, or use the dedicated GoogleTag Manager → Configuration menu the extension adds.
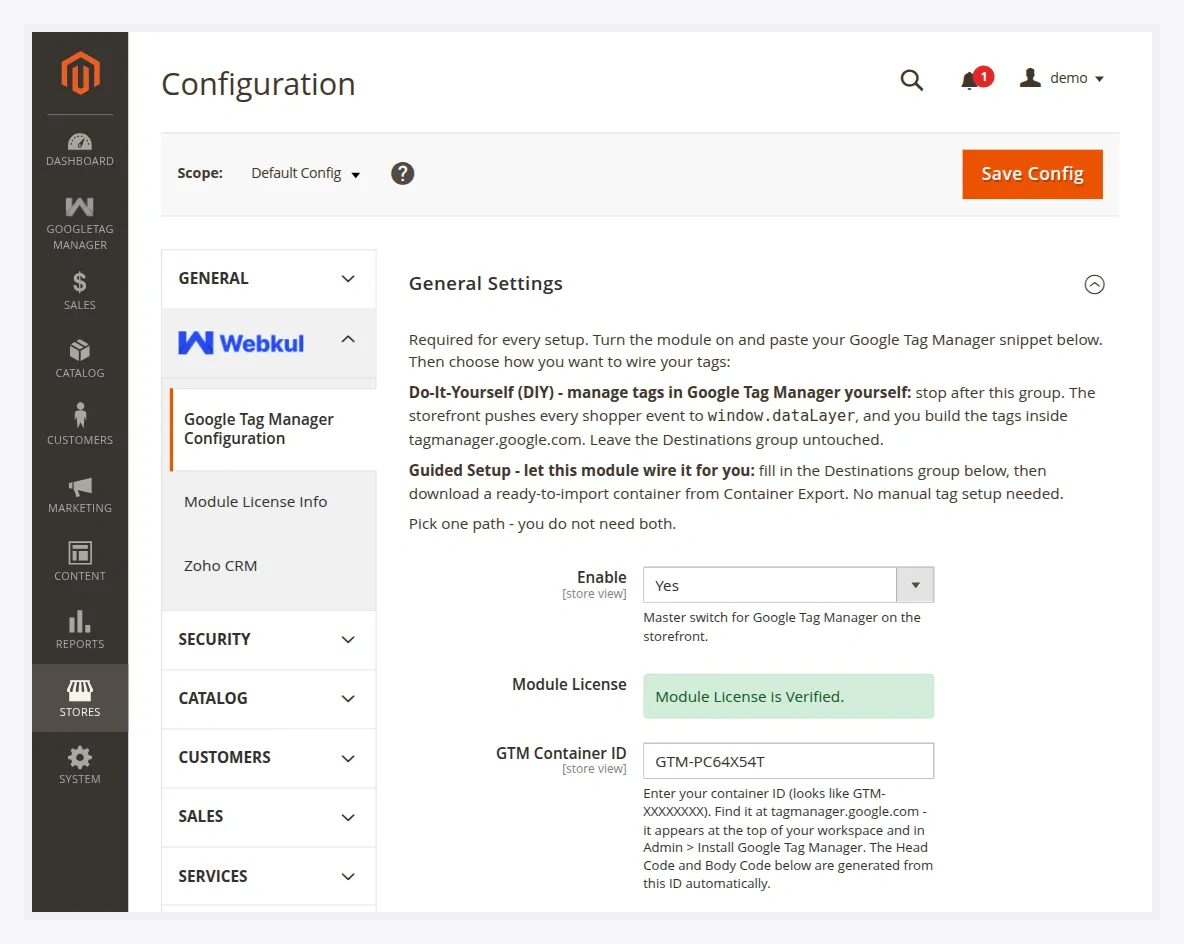
Turn it on and connect
In the General group:
- Enable — set to Yes. This is the master switch for Google Tag Manager on the storefront.
- Module License — paste the license key you received with your purchase and save. The license must validate before the container fields unlock.
- GTM Container ID — enter your container ID, which looks like
GTM-XXXXXXX. You can find it at tagmanager.google.com at the top of your workspace, or under Admin → Install Google Tag Manager. See How to find your Container ID. - Head Code / Body Code — these read-only snippets are generated automatically from your Container ID and are shown for reference. The storefront injects them for you; you do not need to paste them into your theme.
- Test Google Tag Manager Setup — click this button to confirm the container is reachable and correctly wired.
Save the configuration and flush the cache:
php bin/magento cache:flush
Choose your path
With the container connected, the storefront already pushes shopper events to window.dataLayer. Now decide how tags fire:
- Do-It-Yourself — stop here and build your tags inside tagmanager.google.com. The dataLayer is your single source of truth.
- Guided Setup — continue to Destinations, enable GA4 / Google Ads / Meta Pixel, then export a container the module builds for you.
Confirm it is live
Open your storefront, then:
- View page source and confirm the GTM snippet (
GTM-XXXXXXX) is present in<head>. - Open the browser console and type
window.dataLayer— you should see an array that grows as you browse. - Use GTM Preview mode to watch events arrive in real time.
If nothing appears, see Troubleshooting.