
Shopify Accounts
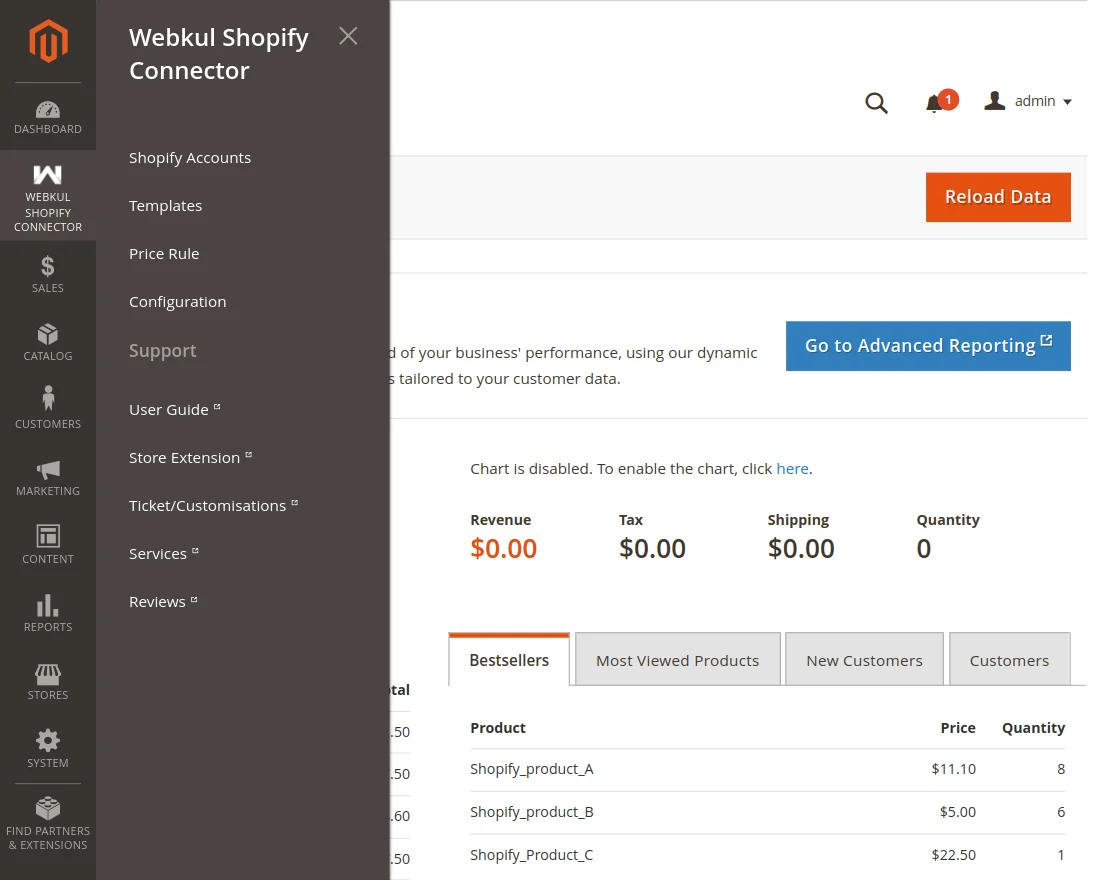
The admin can navigate to Webkul Shopify Connector > Shopify Accounts for managing and adding Shopify Accounts.
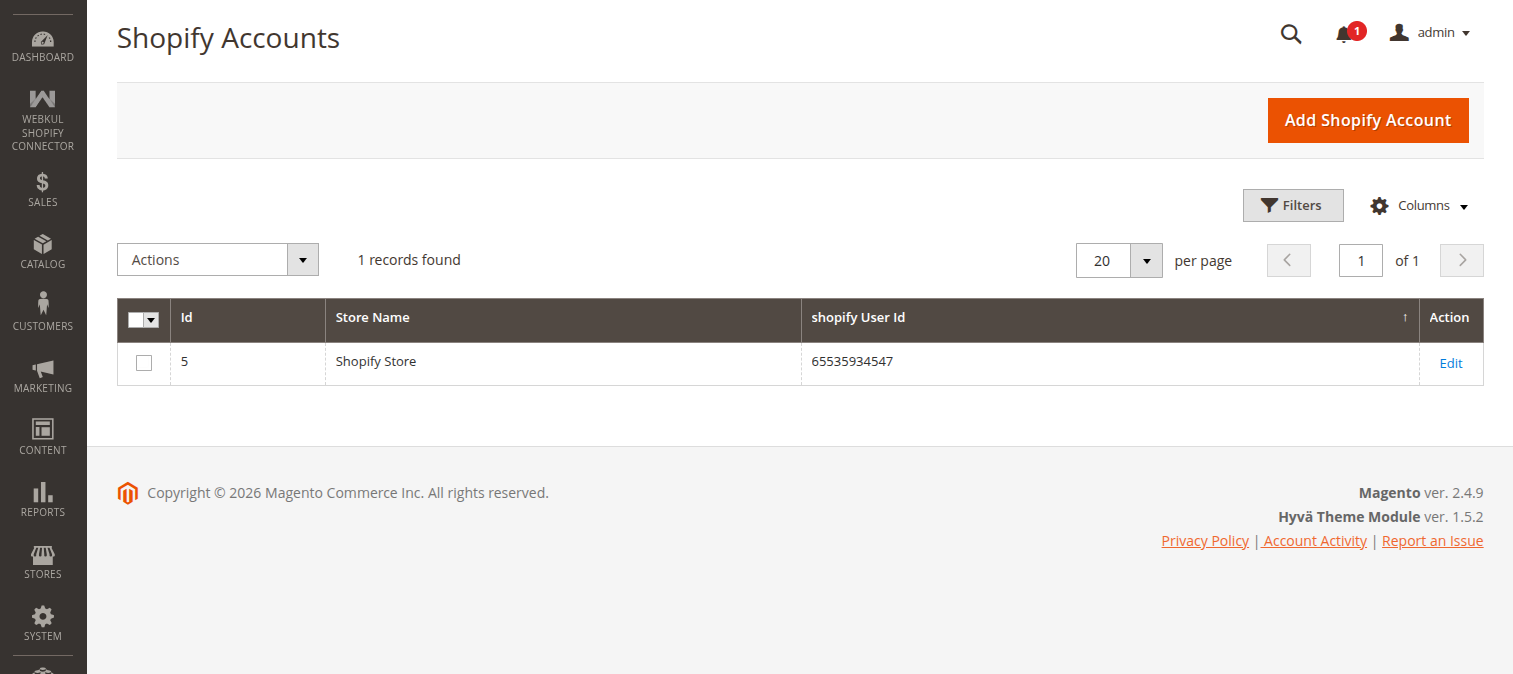
On the Shopify accounts list page, the admin can:
- Edit: Edit the Shopify account details.
- Delete: Remove the existing Shopify account from the list.
- Add Shopify Account: Add/create a new Shopify account.
Add Shopify Account
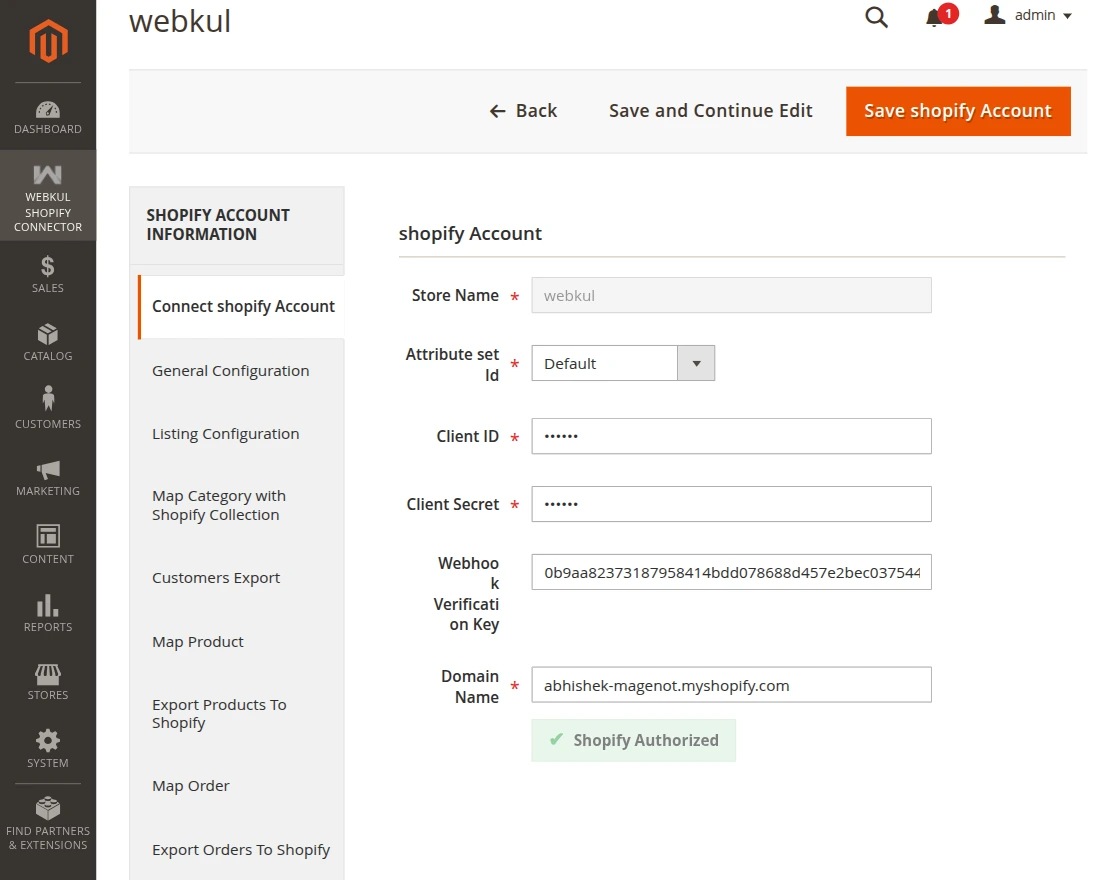
After clicking on "Add Shopify Account", enter the following details:
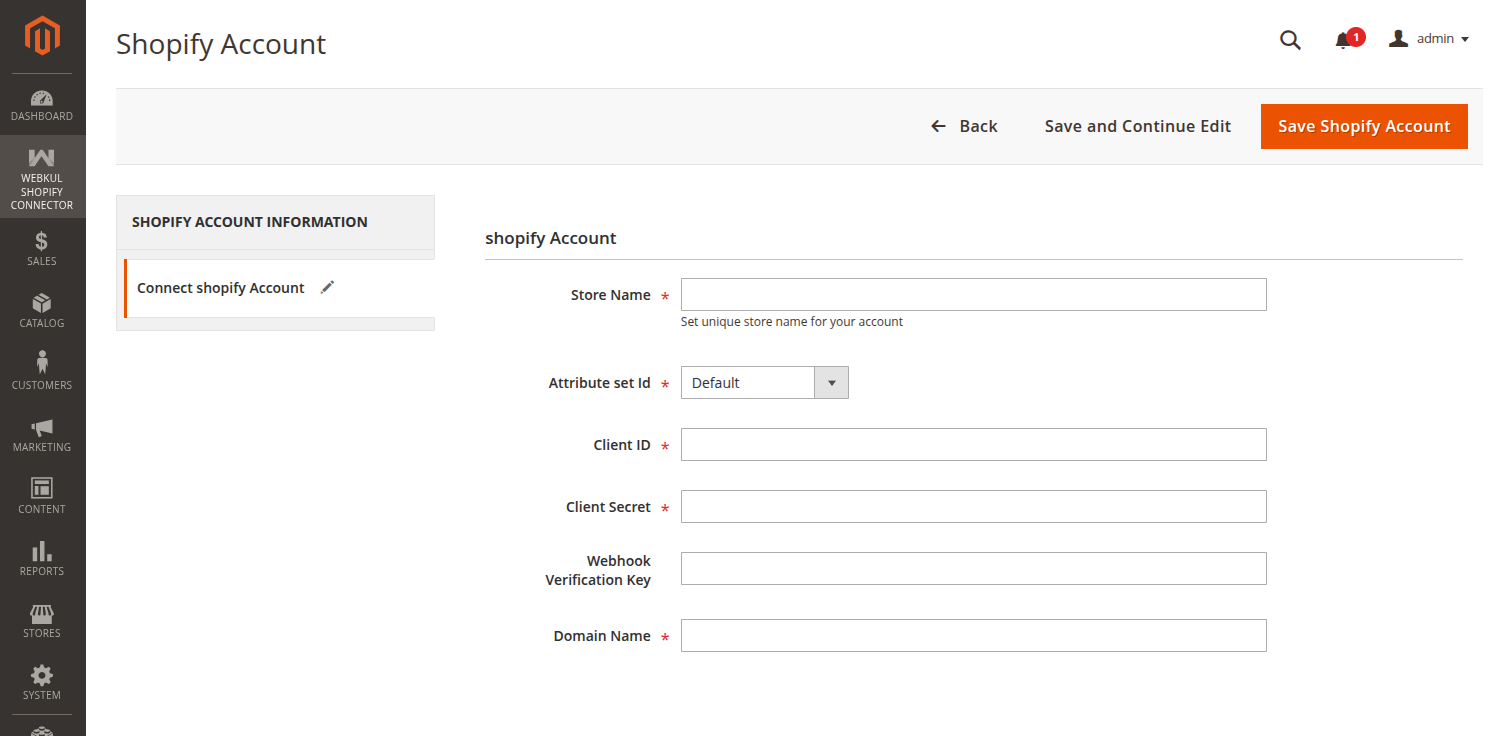
- Store Name: Enter your Shopify store name.
- Attribute set: Select the attribute set for the imported product.
- Client ID: Enter the Client ID from Shopify.
- Client Secret: Enter the Client Secret from Shopify.
- Webhook Verification Key: Enter the key obtained from Shopify Webhook Settings.
- Domain Name: Enter the base URL of your Shopify store (e.g.,
webkul.myshopify.com).
After entering details, click Save Shopify Account.
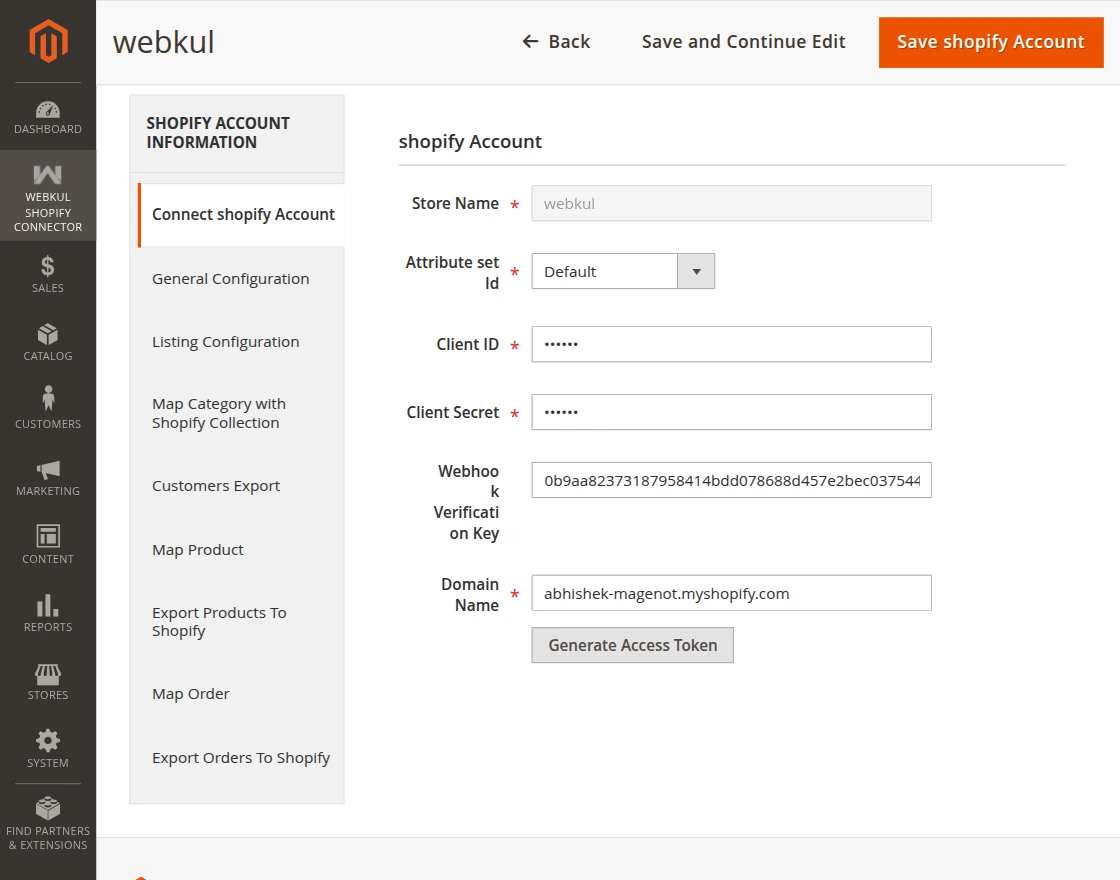
Then, click the Generate Access Token button to start the Shopify authentication process. Once successful, the system displays the "Shopify Authorized" status.
Note
After the Shopify Connect account details are saved, the general configuration and listing configuration also need to be saved again for the further process.
General Configuration
Here the admin will configure the General Configuration specific to this account:
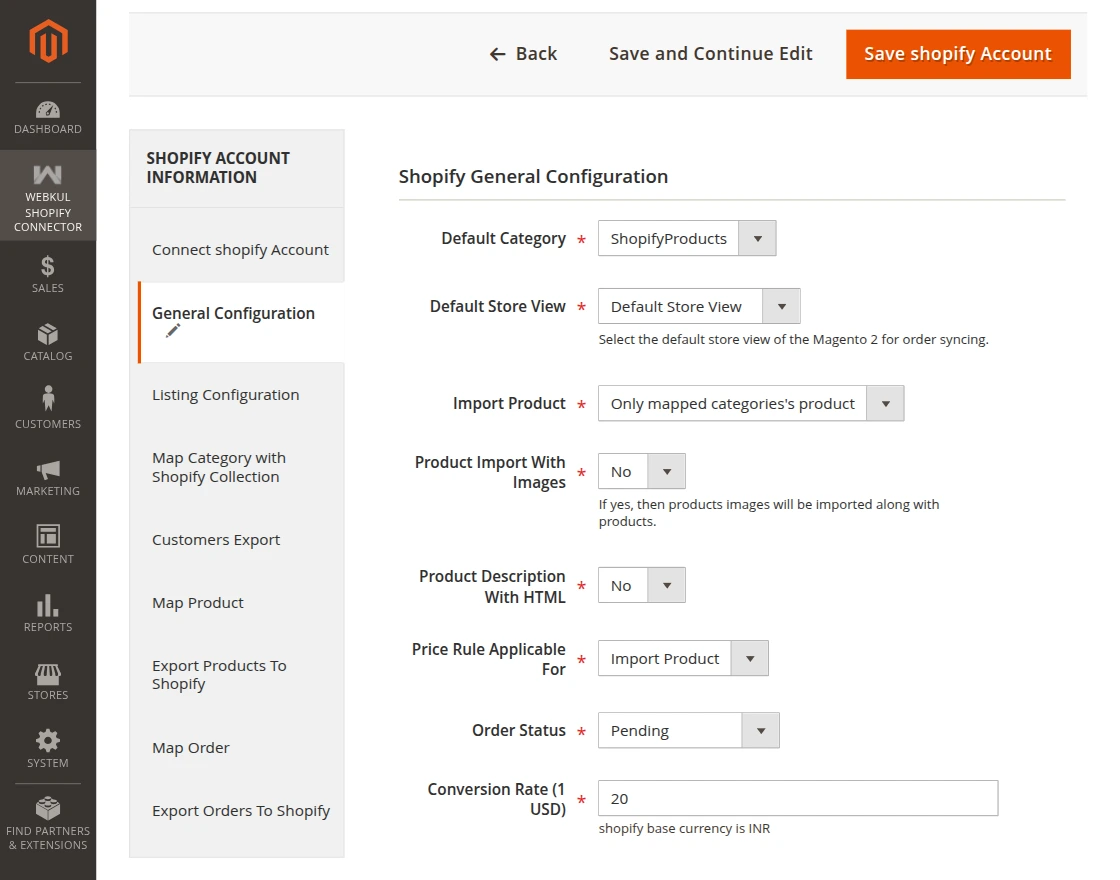
- Default Category: Select default category for imported products.
- Default Store View: Select default store view for order syncing.
- Import Product: Import all or mapped categories products.
- Product Import With Images: Import all product images along with the product.
- Product Description with HTML: Keep HTML formatting or not.
- Price Rule Applicable For: Apply to import or export products.
- Order Status: Default order status for imported orders.
- Conversion Rate: Set the conversion rate.
Listing Configuration
Under this section, the admin will configure the listing settings specific to this account:
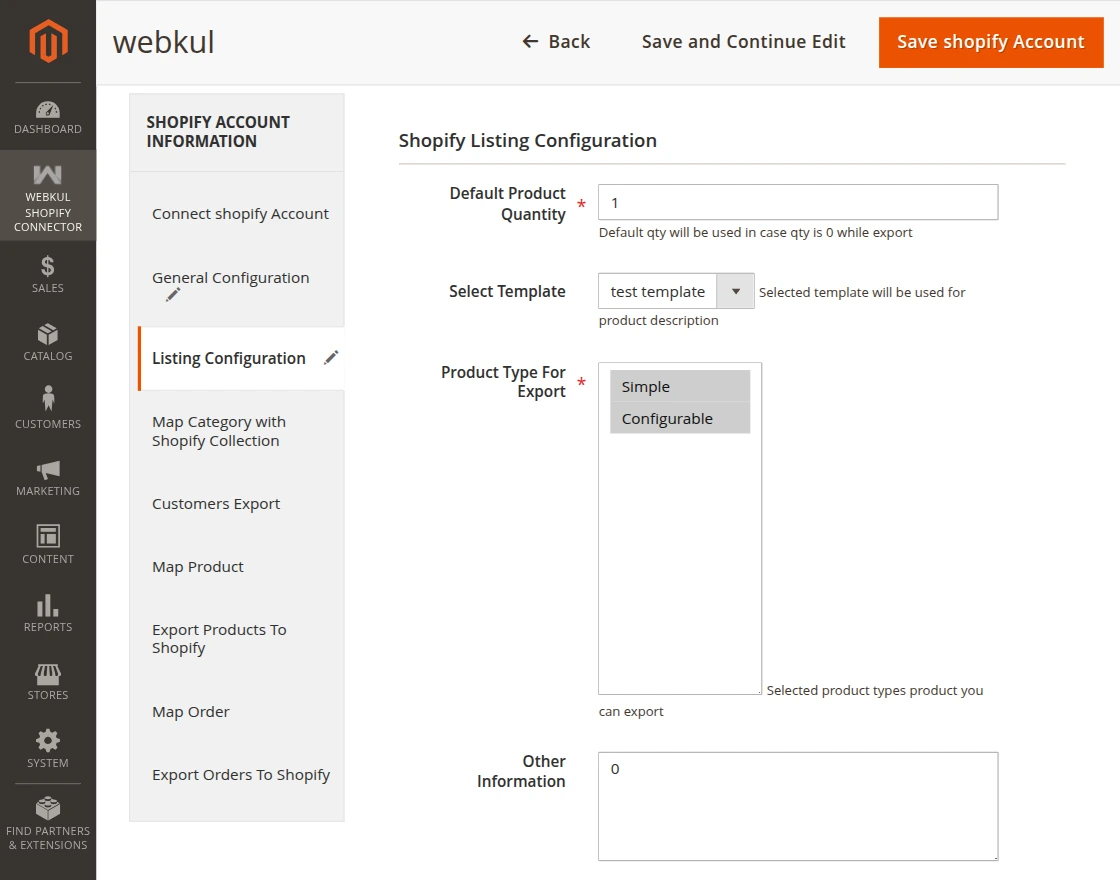
- Default Product Quantity: Set default quantity if Magento quantity is zero.
- Select Template: Export additional information with products.
- Product Type for Export: Type of product to export.
- Other Information: Add any information for exported products.