Installation
Installing the Magento 2 Multi Shopify Store Connector module is a straightforward process. Please follow the steps below to successfully install and prepare the module for use.
Option A — Install from Zip Package
Use this method if you downloaded the module package directly from the Webkul Store.
1. Download Module
Customers will get a zip folder and they have to extract the contents of this zip folder on their system.
2. Upload Folder
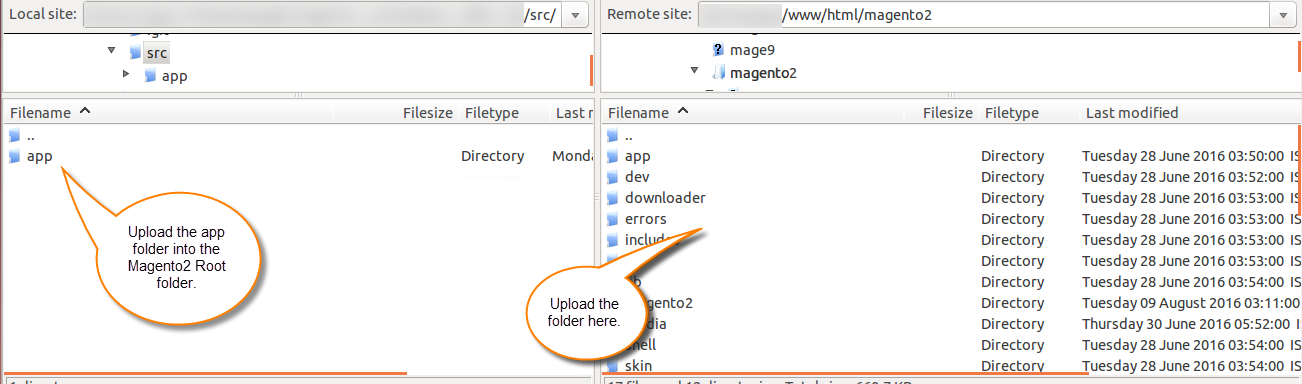
The extracted folder has an src folder, inside the src folder you have the app folder. You need to transfer this app folder into the Magento 2 root directory on the server.
3. Run Commands
After the successful upload, you have to run these commands in the Magento 2 root directory:
php bin/magento setup:upgrade
php bin/magento setup:di:compile
php bin/magento setup:static-content:deploy
php bin/magento indexer:reindex
php bin/magento cache:flush
php bin/magento shopify:import:categories
Option B — Install with Composer
Use this method if the module package is available in your Composer repository.
You need to add the provided access keys during purchase. After that, run the Composer require command to install the package:
composer require webkul/multi-shopify-account-connector
After that, you need to run the installation commands provided in Option A > 3. Run Commands.
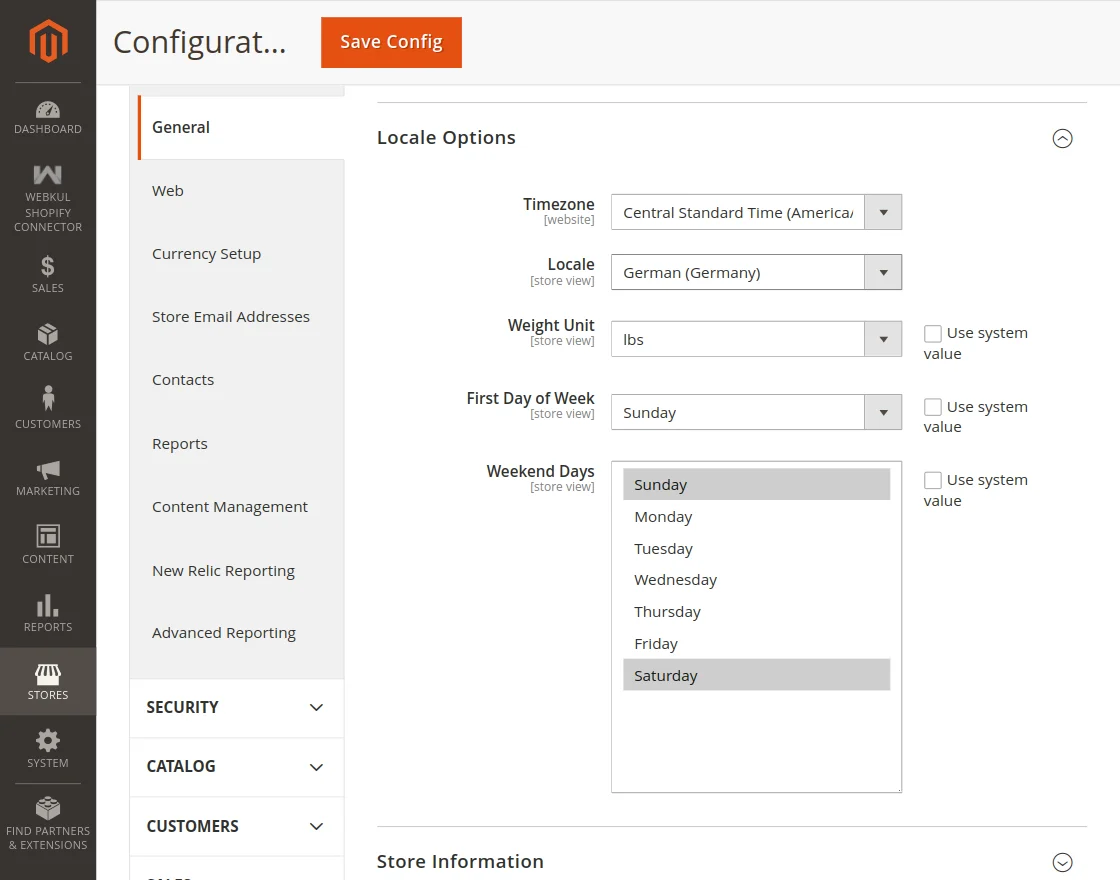
For Multilingual support, please navigate to Store > Configuration > General > Locale Options. And select your desired language from the Locale option.
Language Translation
For module translation, navigate to the following path in your system: app/code/Webkul/MultiShopifyStoreMageConnect/i18n/en_US.csv.
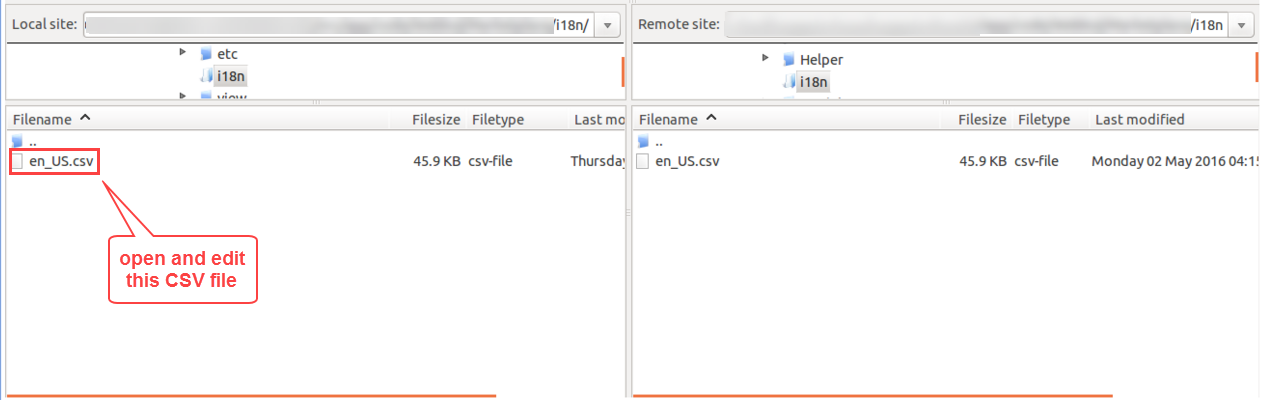
- Open the file named
en_US.csvfor editing.
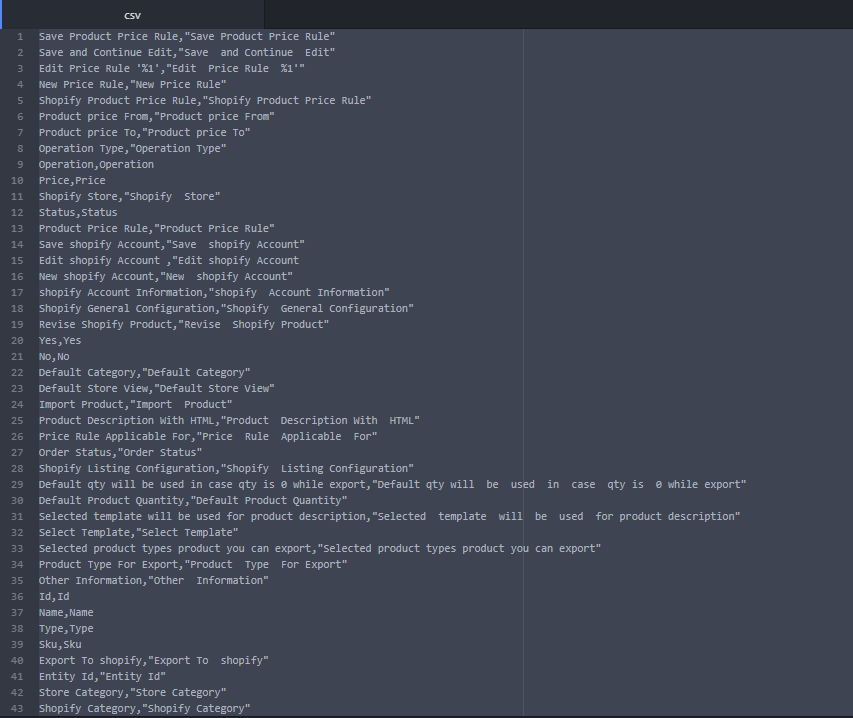
- Replace the words after the comma (
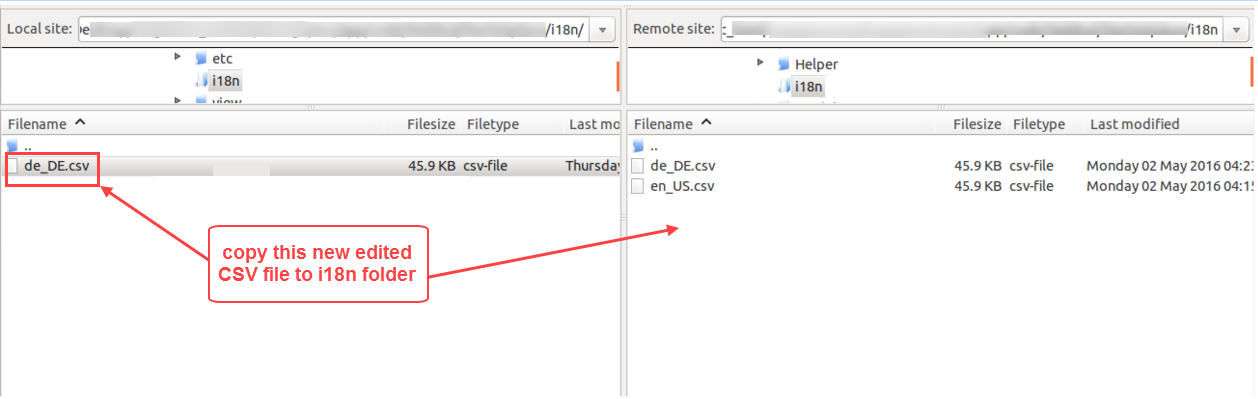
,) on the right in the file with your translated words. - After editing and translating the CSV file, save the translated file name according to your region language and country code (e.g.,
de_DE.csv). - Upload the translated file to the same folder from where you obtained it. Your module translation is complete.