
Outside Canva (REST API & OAuth 2.0) Setup
The Outside Canva configuration handles the secure server-to-server connection between Magento 2 and Canva. It uses OAuth 2.0 with PKCE to authenticate, uploads product images directly to Canva asset storage, and dynamically creates design canvases when you click Design with Canva in Magento Admin.
Step-by-Step Instructions
Step 1: Open Outside Canva Configuration
- In the Canva Developer Portal, select your app.
- In the left navigation menu under Build, click Outside Canva (or click Start integrating).
- Click Configuration.
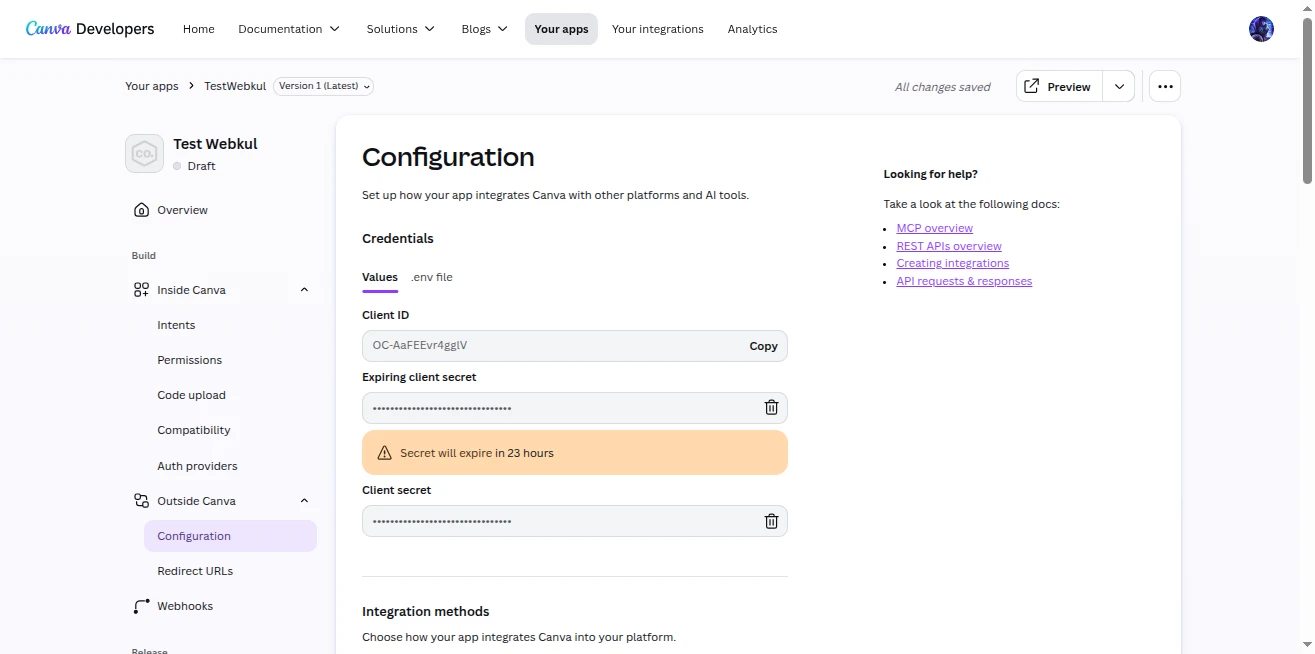
Step 2: Generate & Copy Credentials
Under the Credentials card:
- Click Copy next to Client ID.
- Under Client secret, click Generate secret (or Generate another secret).
- A modal warning will appear: "Copy your secret now and save it in a safe space. This is your only chance to do so."
- Click Copy next to the generated Client Secret.
- In your Magento Admin Panel, go to: Stores > Configuration > Webkul > Canva Connect Settings
- Paste the Client ID and Client Secret into the respective fields under General Settings.
Keep Client Secret Secure
Canva masks the Client Secret once you leave or refresh the page. Always copy and save it into Magento Admin immediately after generation.
Step 3: Configure Redirect URLs
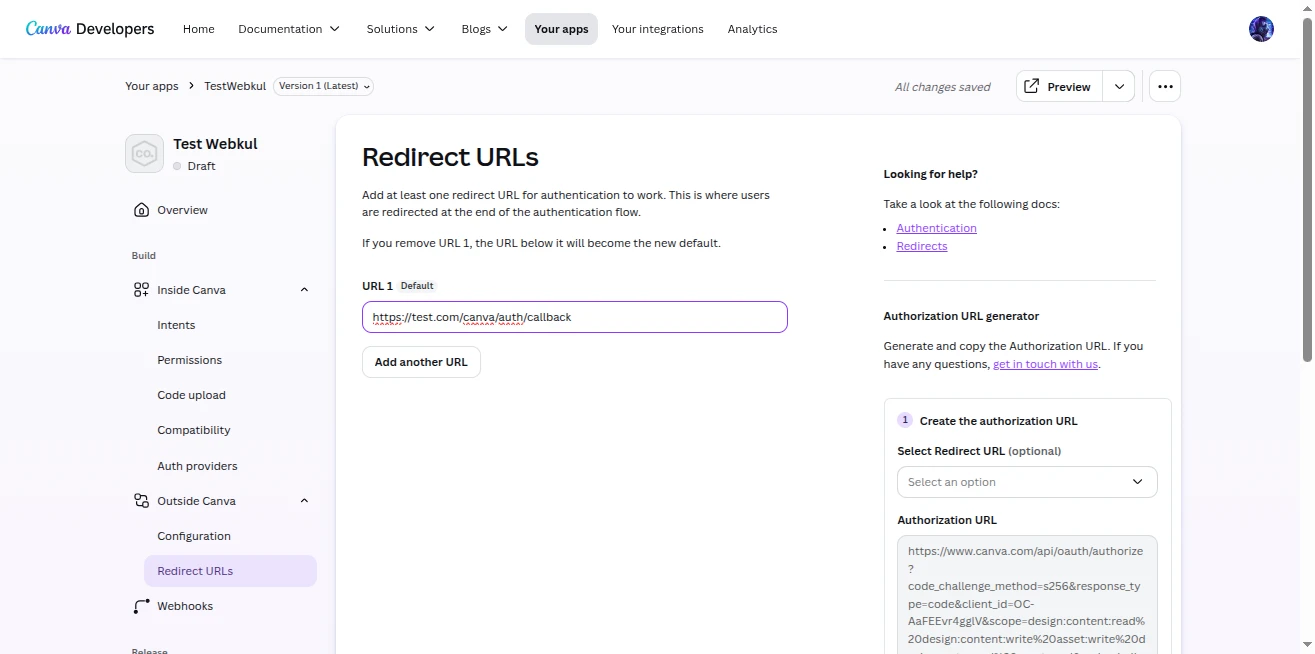
- In the left navigation menu under Outside Canva, click Redirect URLs.
- Copy the Redirect URI from your Magento Admin (Stores > Configuration > Webkul > Canva Connect Settings):
https://your-magento-domain.com/canva/auth/callback - In the Canva Developer Portal, enter this URL into the URL 1 (Default) field.
- Click outside or press Enter to ensure the URL is saved.
Exact Domain Matching
The Redirect URI must match your Magento URL scheme and path exactly (including https:// protocol). Any discrepancy will trigger an OAuth redirect_uri_mismatch error during authorization.
Step 4: Configure Canva REST APIs & Scopes (Critical)
- Return to Outside Canva > Configuration.
- Scroll down to Integration methods and ensure Canva REST APIs is toggled ON.
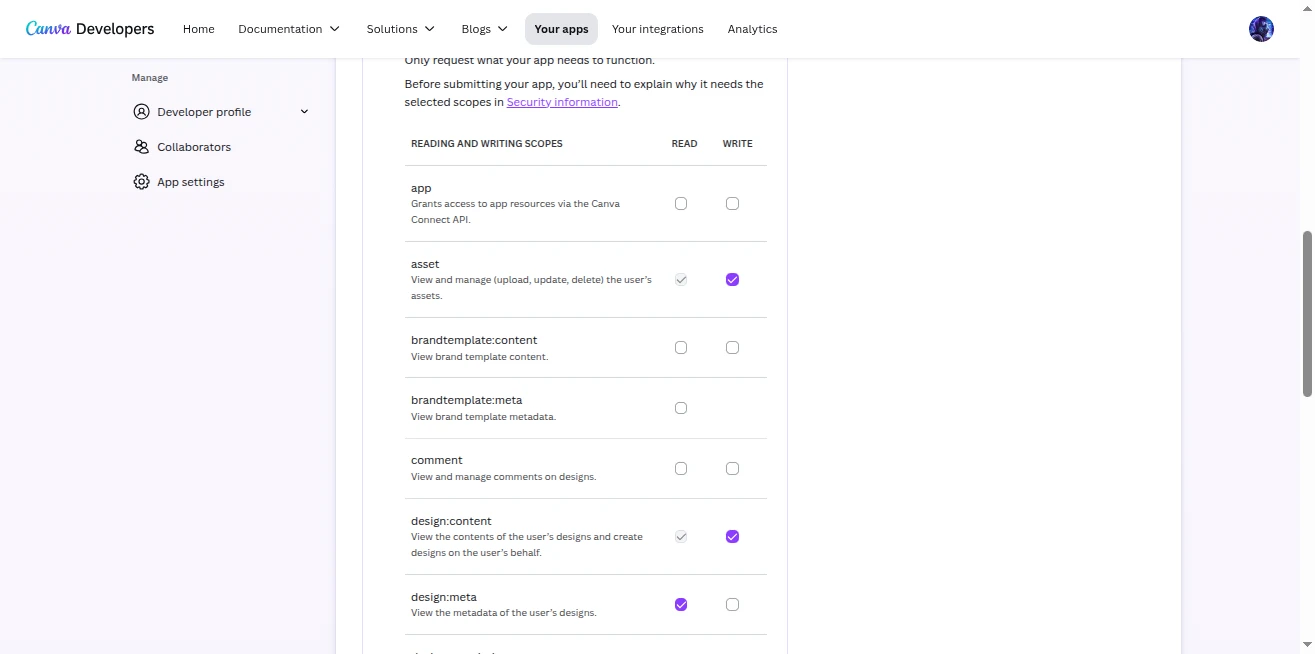
- Under Scopes, enable the following required permissions:
| Scope | Read | Write | Description |
|---|---|---|---|
asset | ☑ | ☑ | Allows Magento to upload product images into Canva asset storage and read asset metadata. |
design:content | ☑ | ☑ | Allows Magento to create new design canvases on behalf of the merchant and read canvas content. |
design:meta | ☑ | — | Allows Magento to read design entity metadata and synchronization logs. |
Authentication Denied (invalid_scope) Error
If the above scopes are not enabled under Outside Canva > Configuration > Scopes, Canva will reject Magento's OAuth authorization request with:
Authentication Denied
Canva authorization was denied or failed. error=invalid_scope&error_description=Requested scopes are invalid.
Always verify that both Read and Write are checked for asset and design:content, and Read is checked for design:meta.
Step 5: Test Authorization Flow
- In Magento Admin, click Save Config to persist all credentials.
- Flush Magento cache if prompted (System > Cache Management > Flush Magento Cache).
- Navigate to Catalog > Products.
- In the thumbnail column of any product with an image, click Design with Canva.
- Canva presents the OAuth consent screen:
- "App would like access to your Canva account: Read your design content, Create designs, Read your design metadata, Read your asset metadata, Upload, modify and delete your assets."
- Click Allow.
- Canva exchanges tokens securely, creates a new design canvas with your product photo, and redirects you into the Canva editor.