Canva Connect REST API Setup
The Canva Connect Integration handles the backend server-to-server connection between Magento and Canva. It uses OAuth 2.0 with PKCE to authenticate, uploads product images directly to Canva asset storage, and generates new Canva designs dynamically when you click "Design with Canva" in the Magento product grid.
Step-by-Step Instructions
Step 1: Create an Integration
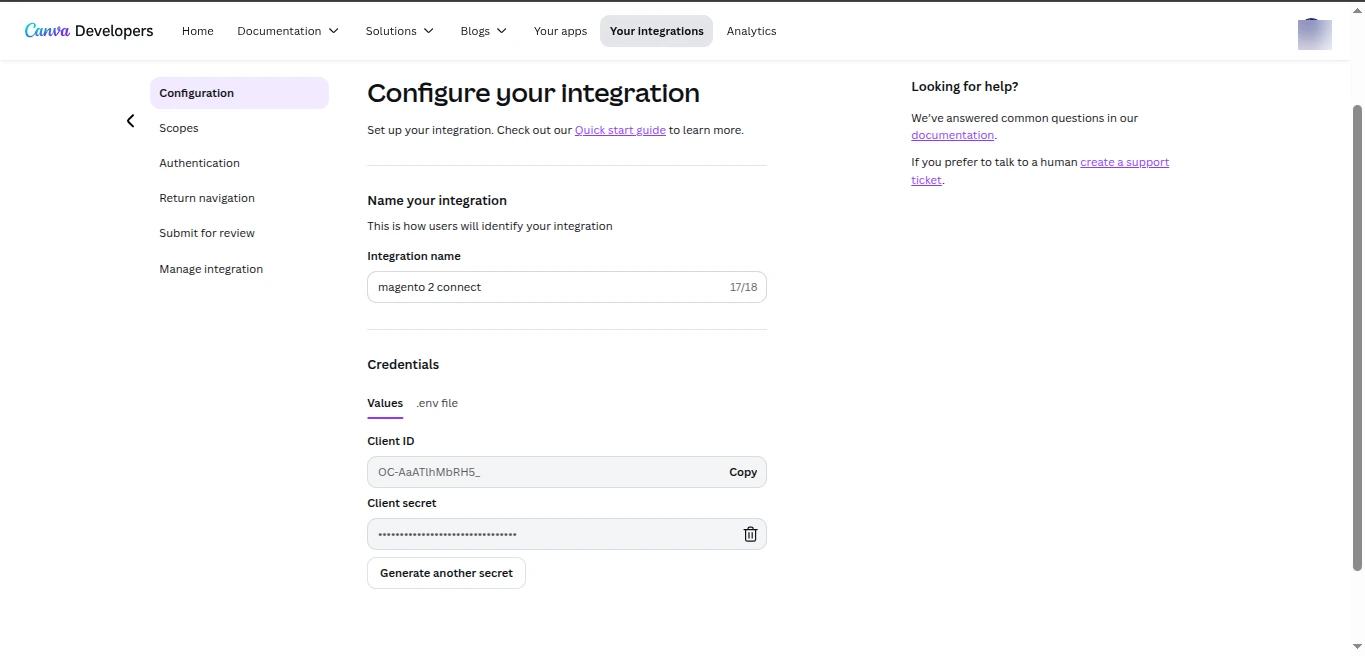
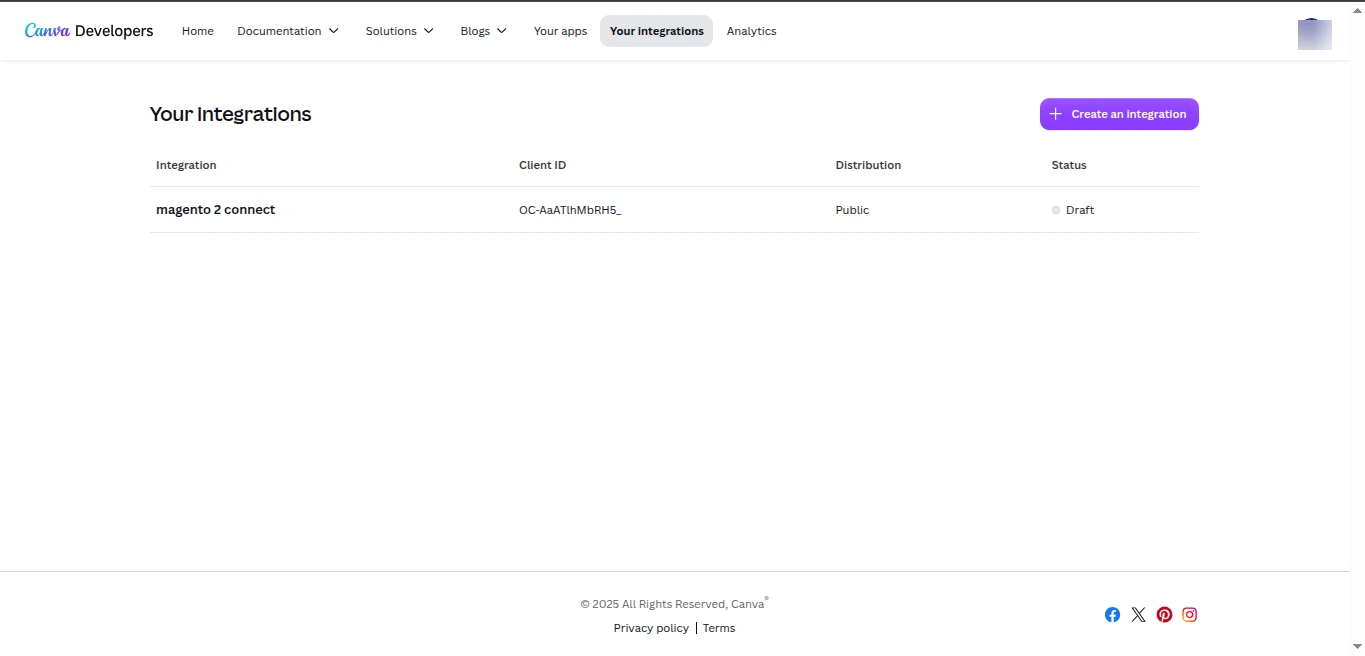
- In the Canva Developer Portal, select Your integrations (under Canva Connect APIs) from the top navigation.
- Click Create an integration.
- Enter an Integration Name (e.g.
magento 2 connect). - Click Create.
Step 2: Configure OAuth 2.0 URIs
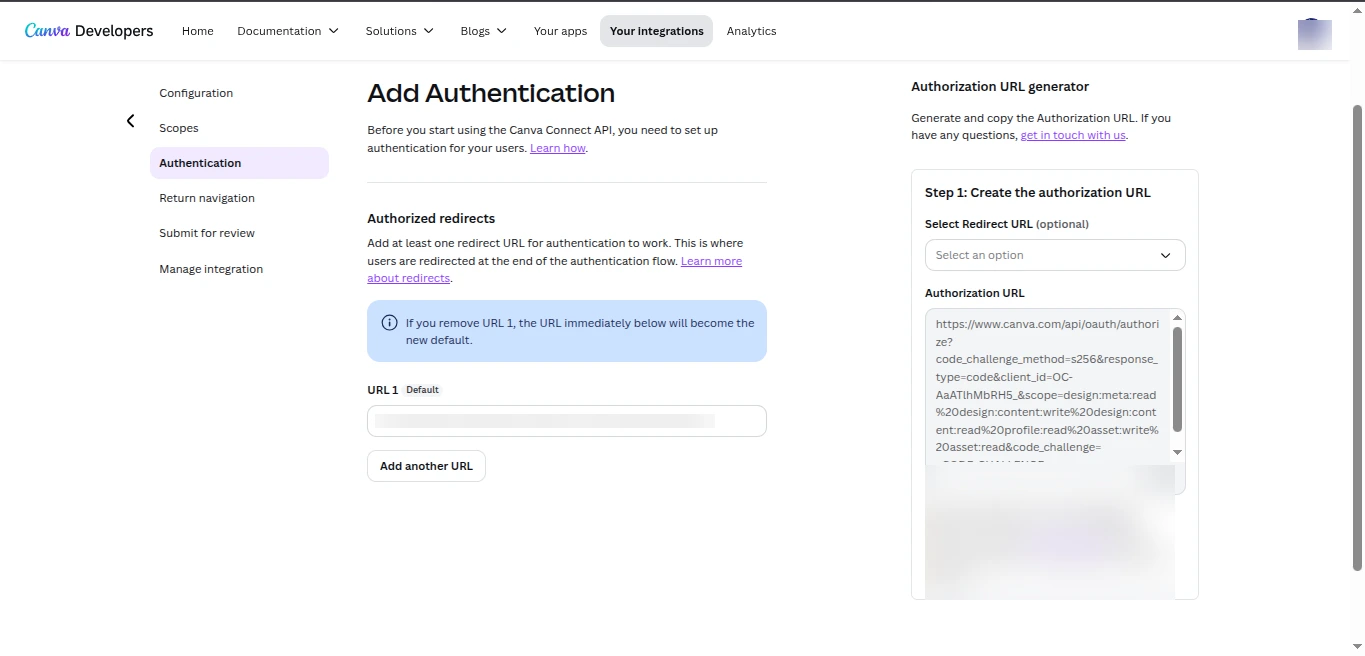
Under the Authentication / OAuth 2.0 settings:
- In Redirect URLs, paste the Redirect URI from your Magento Admin (Stores > Configuration > Webkul > Canva Connect Settings):
https://your-magento-domain.com/canva/auth/callback - In Return Navigation URLs, paste the Return Navigation URI from your Magento Admin:
https://your-magento-domain.com/canva/auth/return - Click Save Changes.
URL Matching
The Redirect URI and Return Navigation URI must match your Magento store domain exactly (including https:// protocol and path). Mismatches will cause OAuth error redirect_uri_mismatch.
Step 3: Configure Integration Scopes
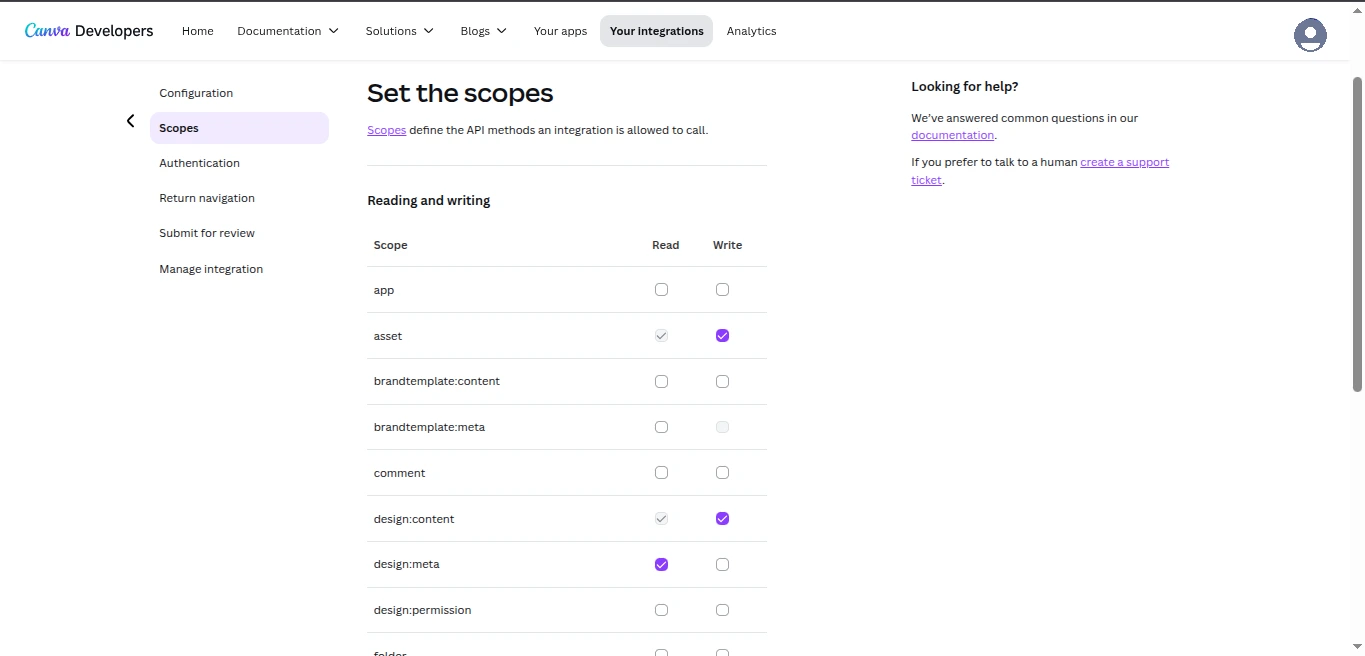
Under Permissions / Scopes, enable the following required scopes:
| Scope | Description |
|---|---|
design:content:read | Read design content metadata |
design:content:write | Create and modify designs |
design:meta:read | Read design entity metadata |
asset:read | Read uploaded image assets |
asset:write | Upload product images to Canva Asset storage |
Click Save Changes.
Step 4: Copy Client ID & Secret
- Under Configuration > Credentials, locate your:
- Client ID
- Client secret
- Copy both values.
- In Magento Admin, paste them into Stores > Configuration > Webkul > Canva Connect Settings under Client ID and Client Secret.
- Click Save Config.