Supplier Management
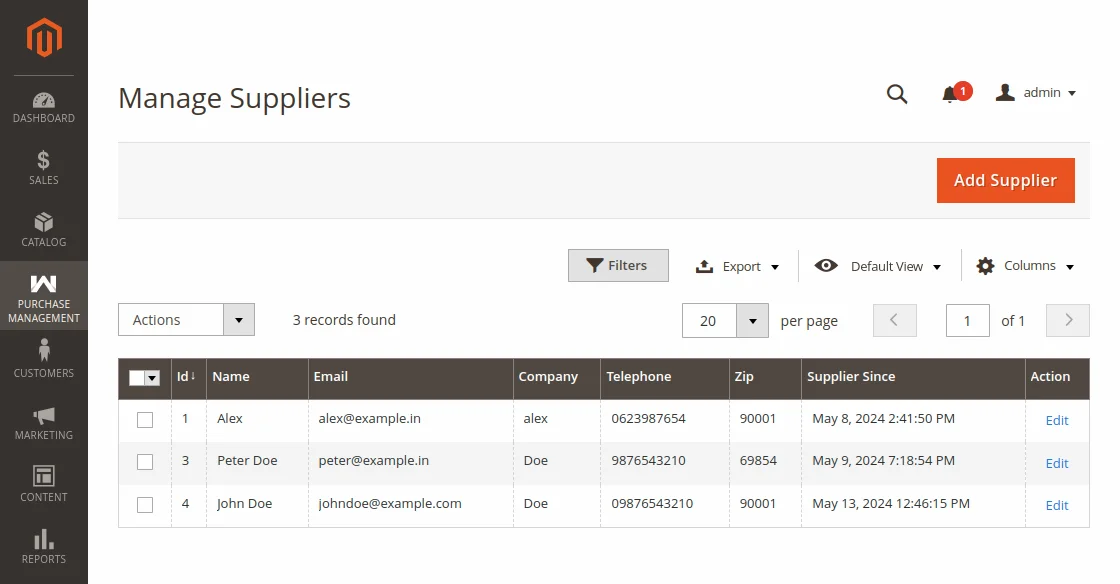
Managing reliable suppliers and their contact profiles is the cornerstone of effective procurement. The Manage Suppliers section provides an exhaustive supplier directory where administrators can create, edit, filter, and monitor all sourcing partners.
Navigating to Suppliers Grid
To view existing suppliers or add a new vendor:
- In the admin menu, navigate to Purchase Management > Manage Suppliers.
- The suppliers table displays:
- ID
- Name
- Telephone / Contact
- Company
- Status (Enabled / Disabled)
- Source (for Multi-Source Inventory)
- Actions (Edit / Delete)
Adding a New Supplier
Click the Add Supplier button located at the top right of the grid.
Fill in the supplier registration details:
Field Descriptions
- Supplier Name: The primary contact person or representative name.
- Supplier Email: Official email address used to receive automated Requests for Quotation (RFQs) and Purchase Orders.
- Telephone / Mobile: Contact telephone number for order status follow-ups.
- Company Name: Registered business entity or manufacturing company name.
- Address & Street: Physical dispatch or office address.
- City, Country & State/Province: Supplier geographic region.
- Zip / Postal Code: Supplier postal location.
- Status: Enable or disable the supplier from receiving quotations.
- Source Selection (MSI): On Magento 2.3+ installations with Multi-Source Inventory enabled, assign which inventory source the supplier replenishes.
Click Save Supplier to finalize the vendor profile.
Supplier Dashboard Tabs
When viewing or editing an existing supplier, the page provides dedicated sub-tabs:
1. Assigned Products Tab
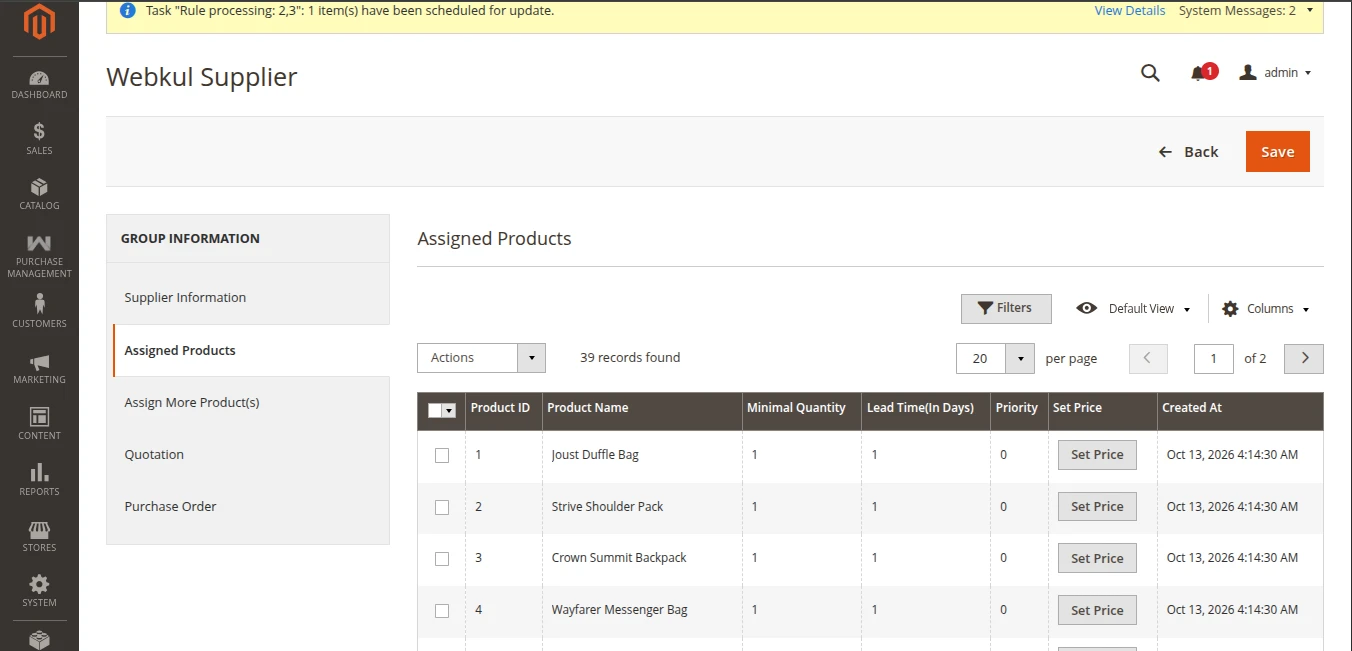
Displays every catalog product currently mapped to this supplier with minimal quantities, lead time in days, priority ranking, and configured set prices.
Unassigning Products via Mass Action
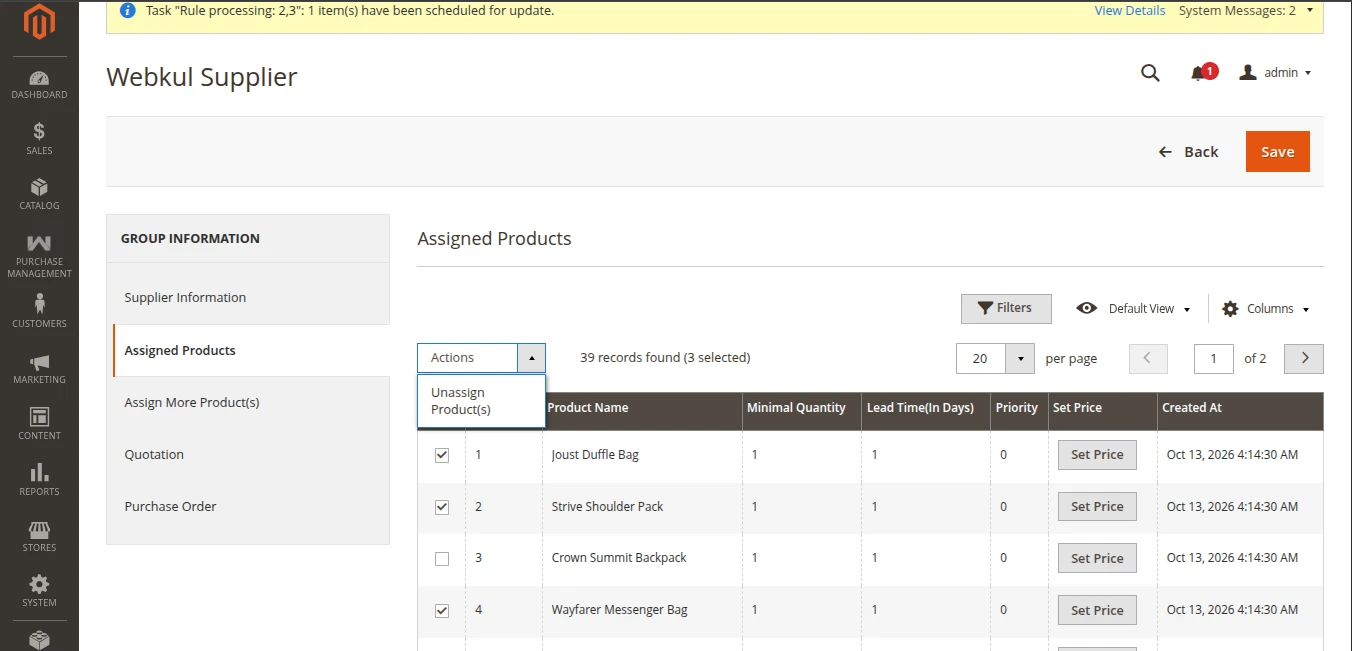
Store administrators can detach products that are no longer fulfilled by this supplier:
- In the Assigned Products tab, check the checkbox for each product you wish to disassociate.
- From the Actions dropdown menu above the grid, select Unassign Product(s).
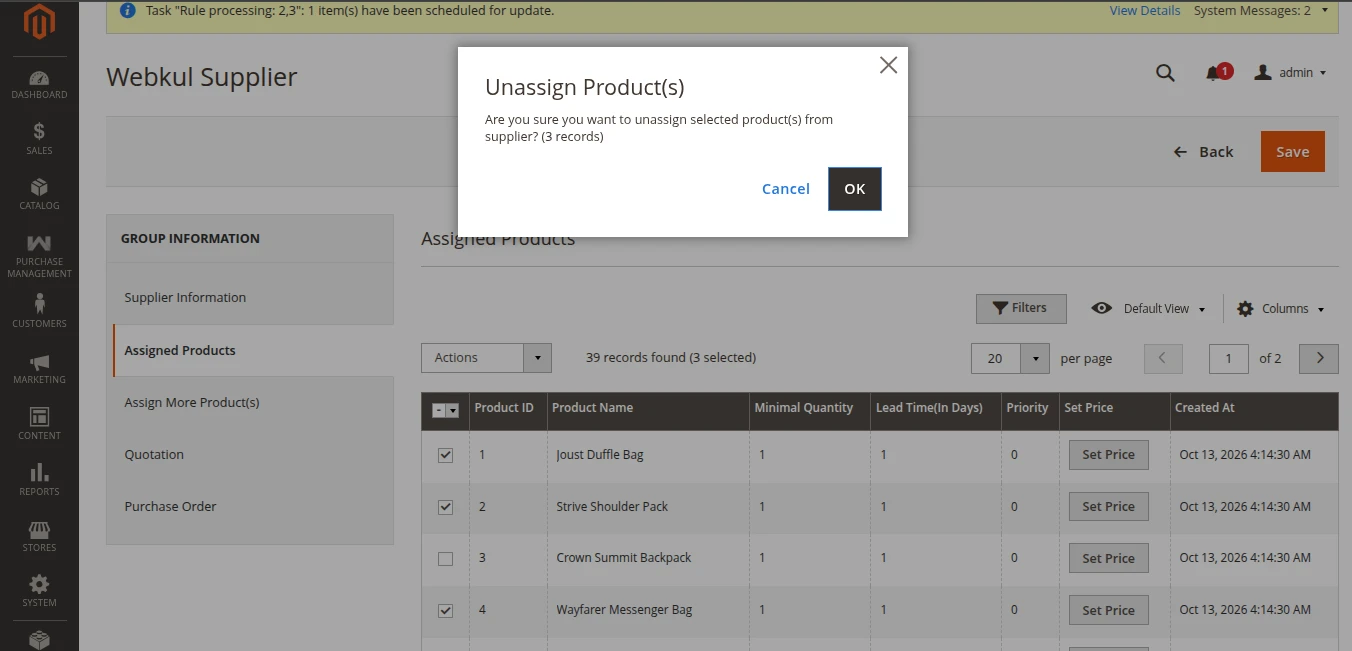
- A confirmation dialog will appear stating: "Are you sure you want to unassign selected product(s) from supplier?"
- Click OK to confirm.
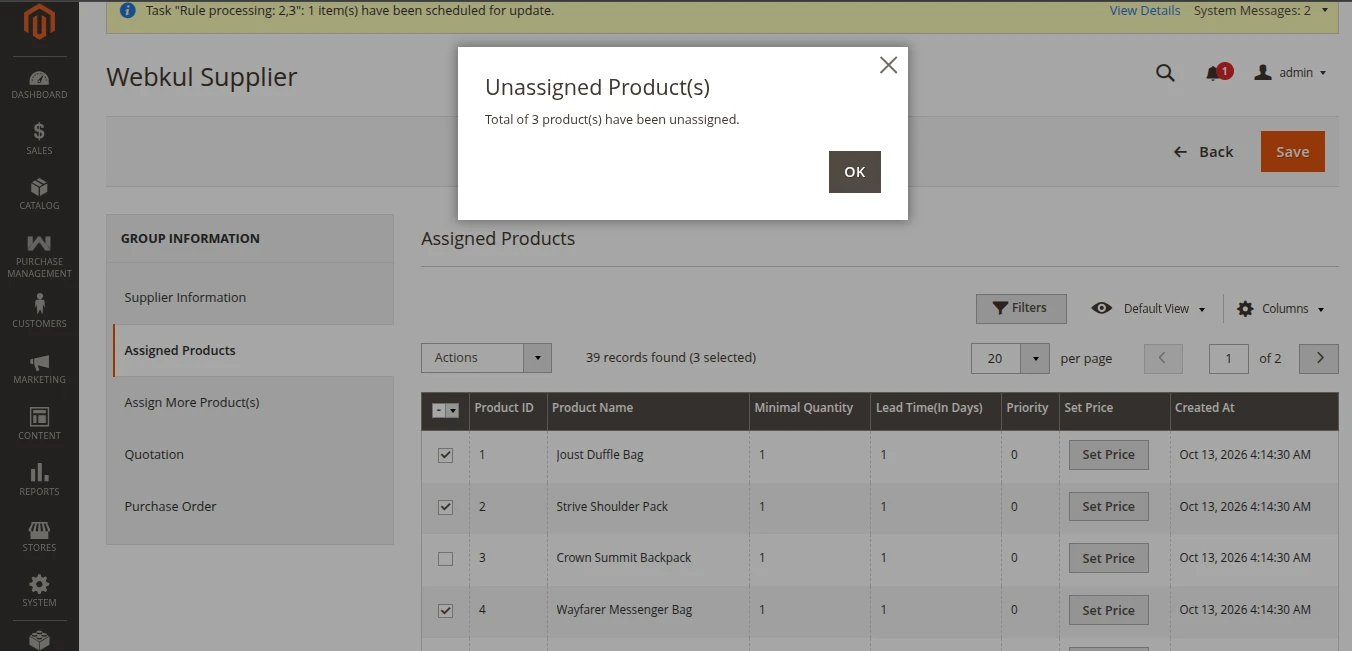
- A success notification will confirm the operation: "Total of X product(s) have been unassigned."
2. Assign More Product(s) Tab
Browse your entire catalog to discover and assign new items directly to the vendor profile.
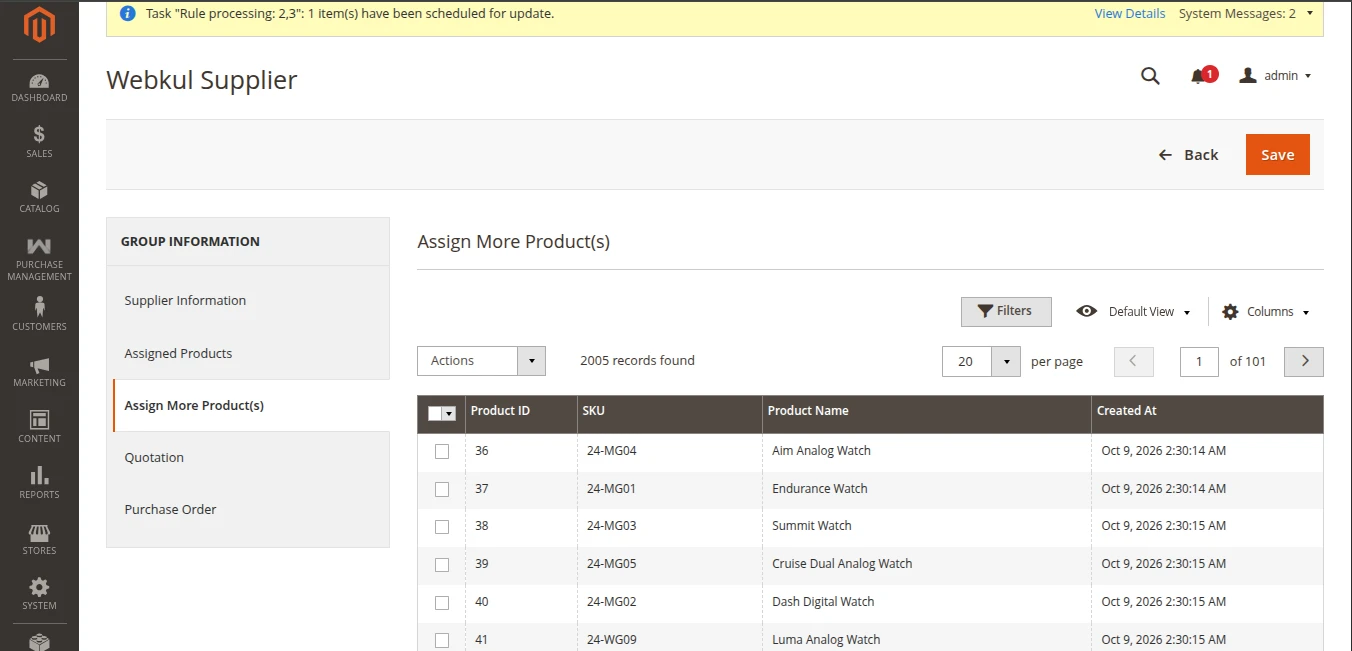
Assigning Products via Mass Action
- Open the Assign More Product(s) sub-tab.
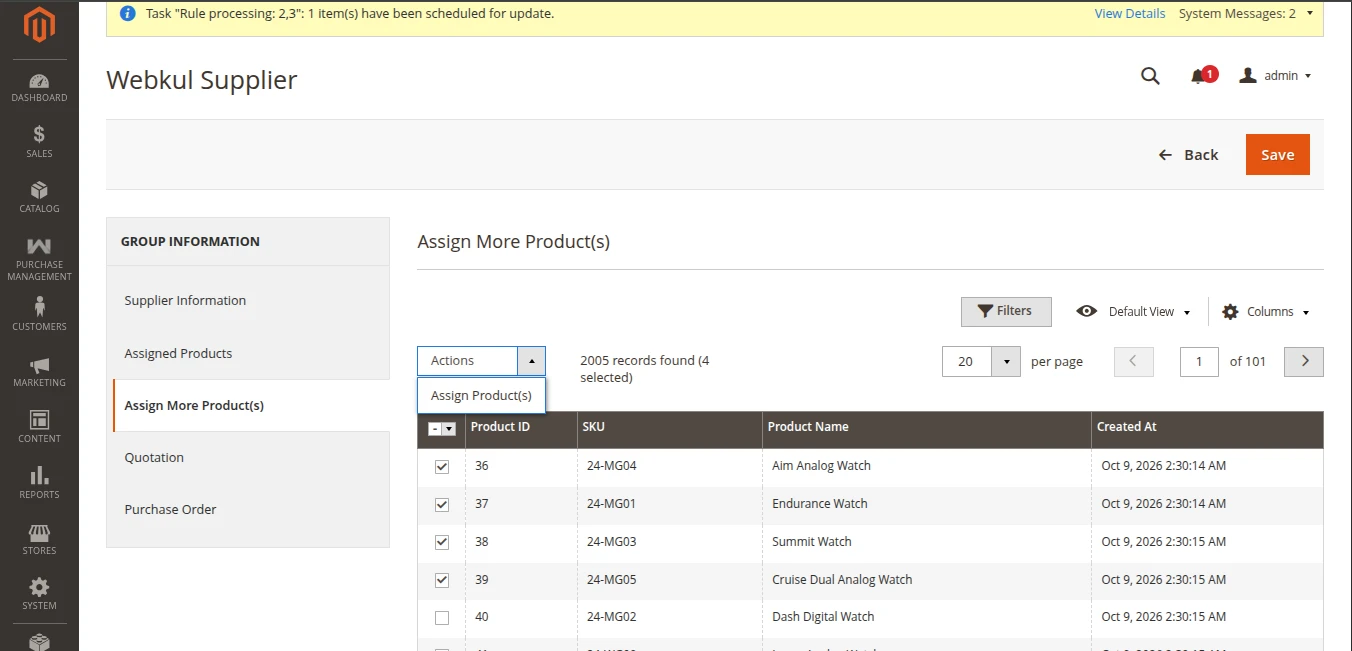
- Select the catalog products you want to map to this supplier using the table checkboxes.
- From the Actions dropdown menu, select Assign Product(s).
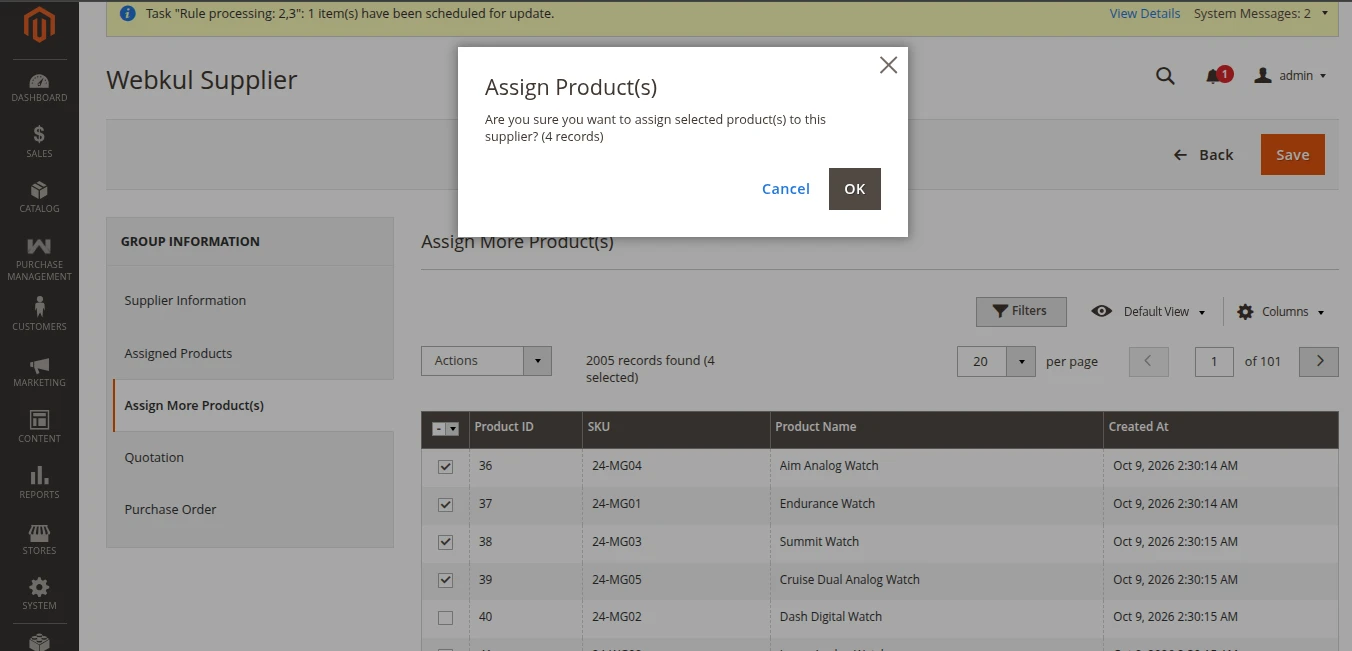
- When prompted by the confirmation popup ("Are you sure you want to assign selected product(s) to this supplier?"), click OK.
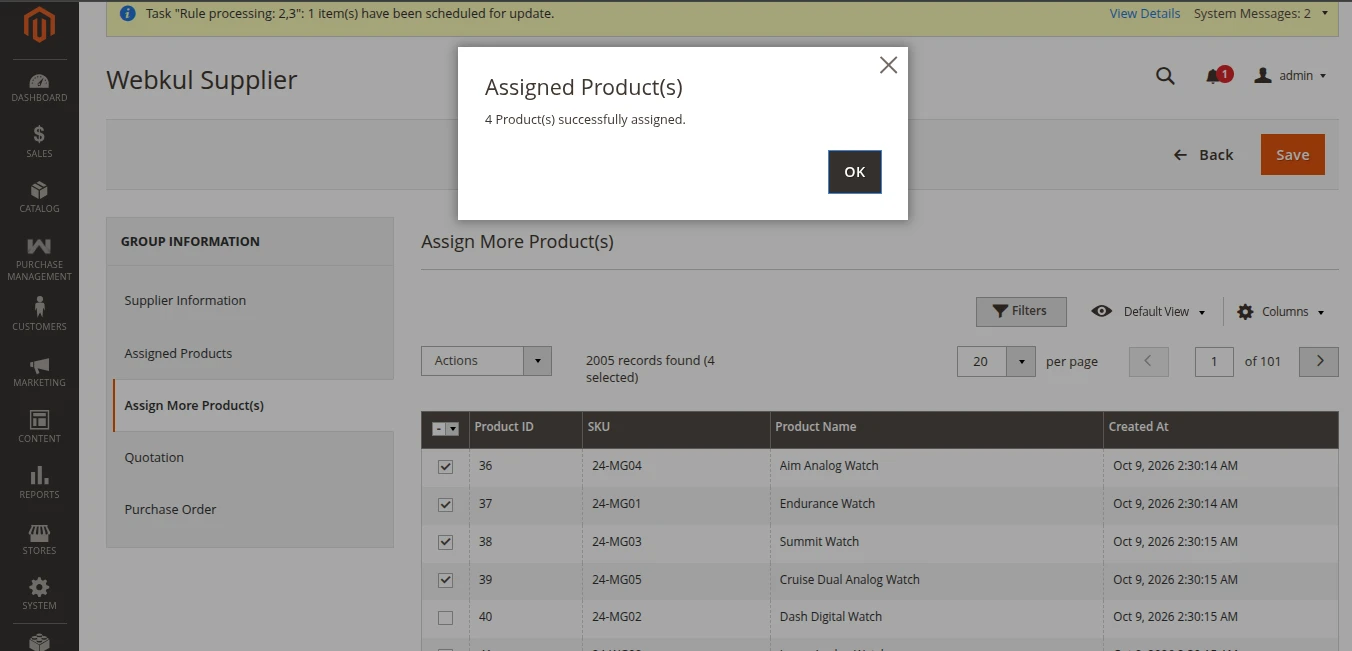
- A success popup confirms that the selected products have been successfully assigned to the supplier.
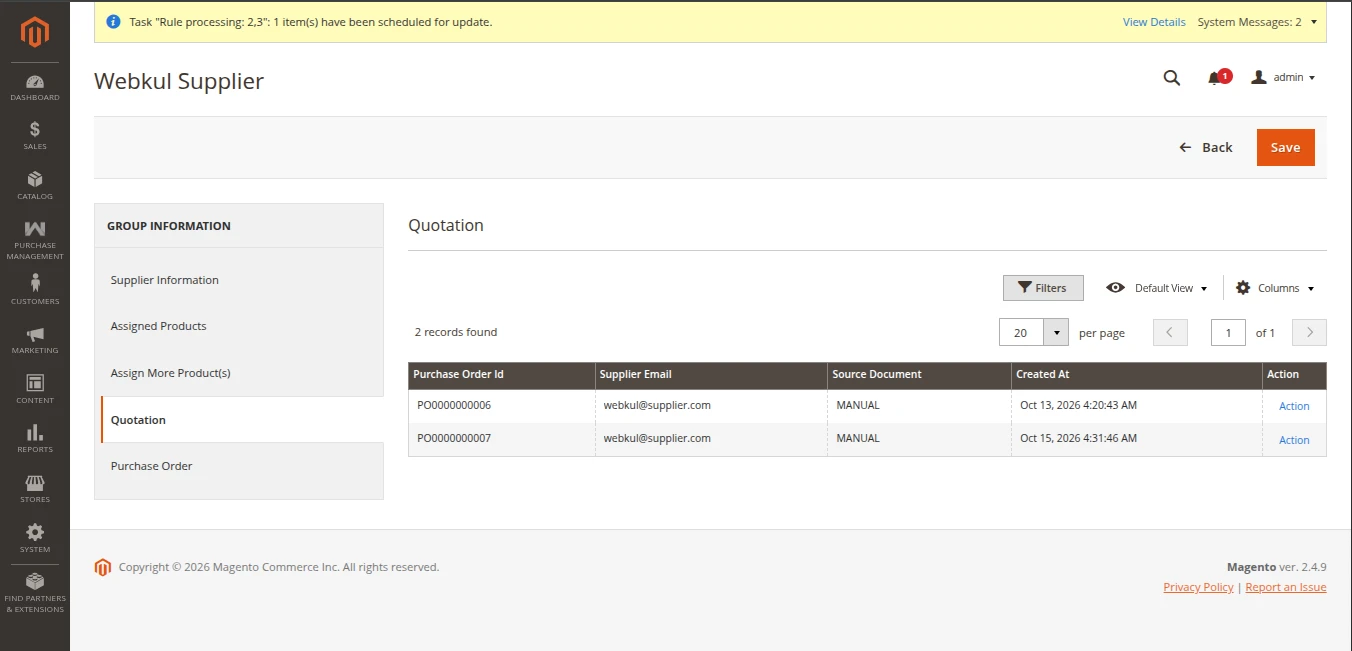
3. Quotation Tab
Displays a history of all quotations and RFQs created for this specific supplier along with their real-time approval status.
4. Purchase Order Tab
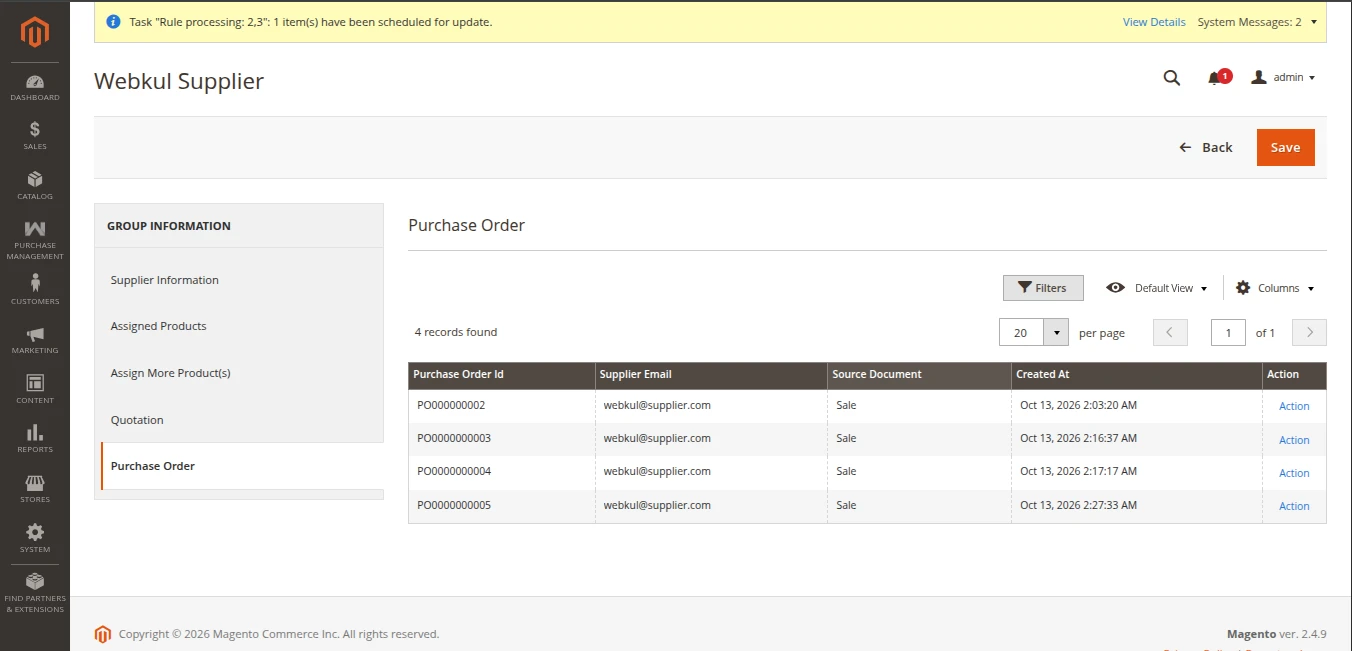
Displays all confirmed Purchase Orders awarded to this vendor with quick access to print or download PO PDFs.