
Configuration Settings
Configure global preferences, link expiration policies, email templates, and administrative controls for the Webkul Marketplace Seller Invitation for Magento 2 extension.
Accessing Configuration Settings
To access the module configuration in your Magento Admin Panel:
- In the left navigation menu, navigate to Stores → Configuration.
- In the left-hand panel, expand the Marketplace group.
- Click on the Seller Invitation tab.
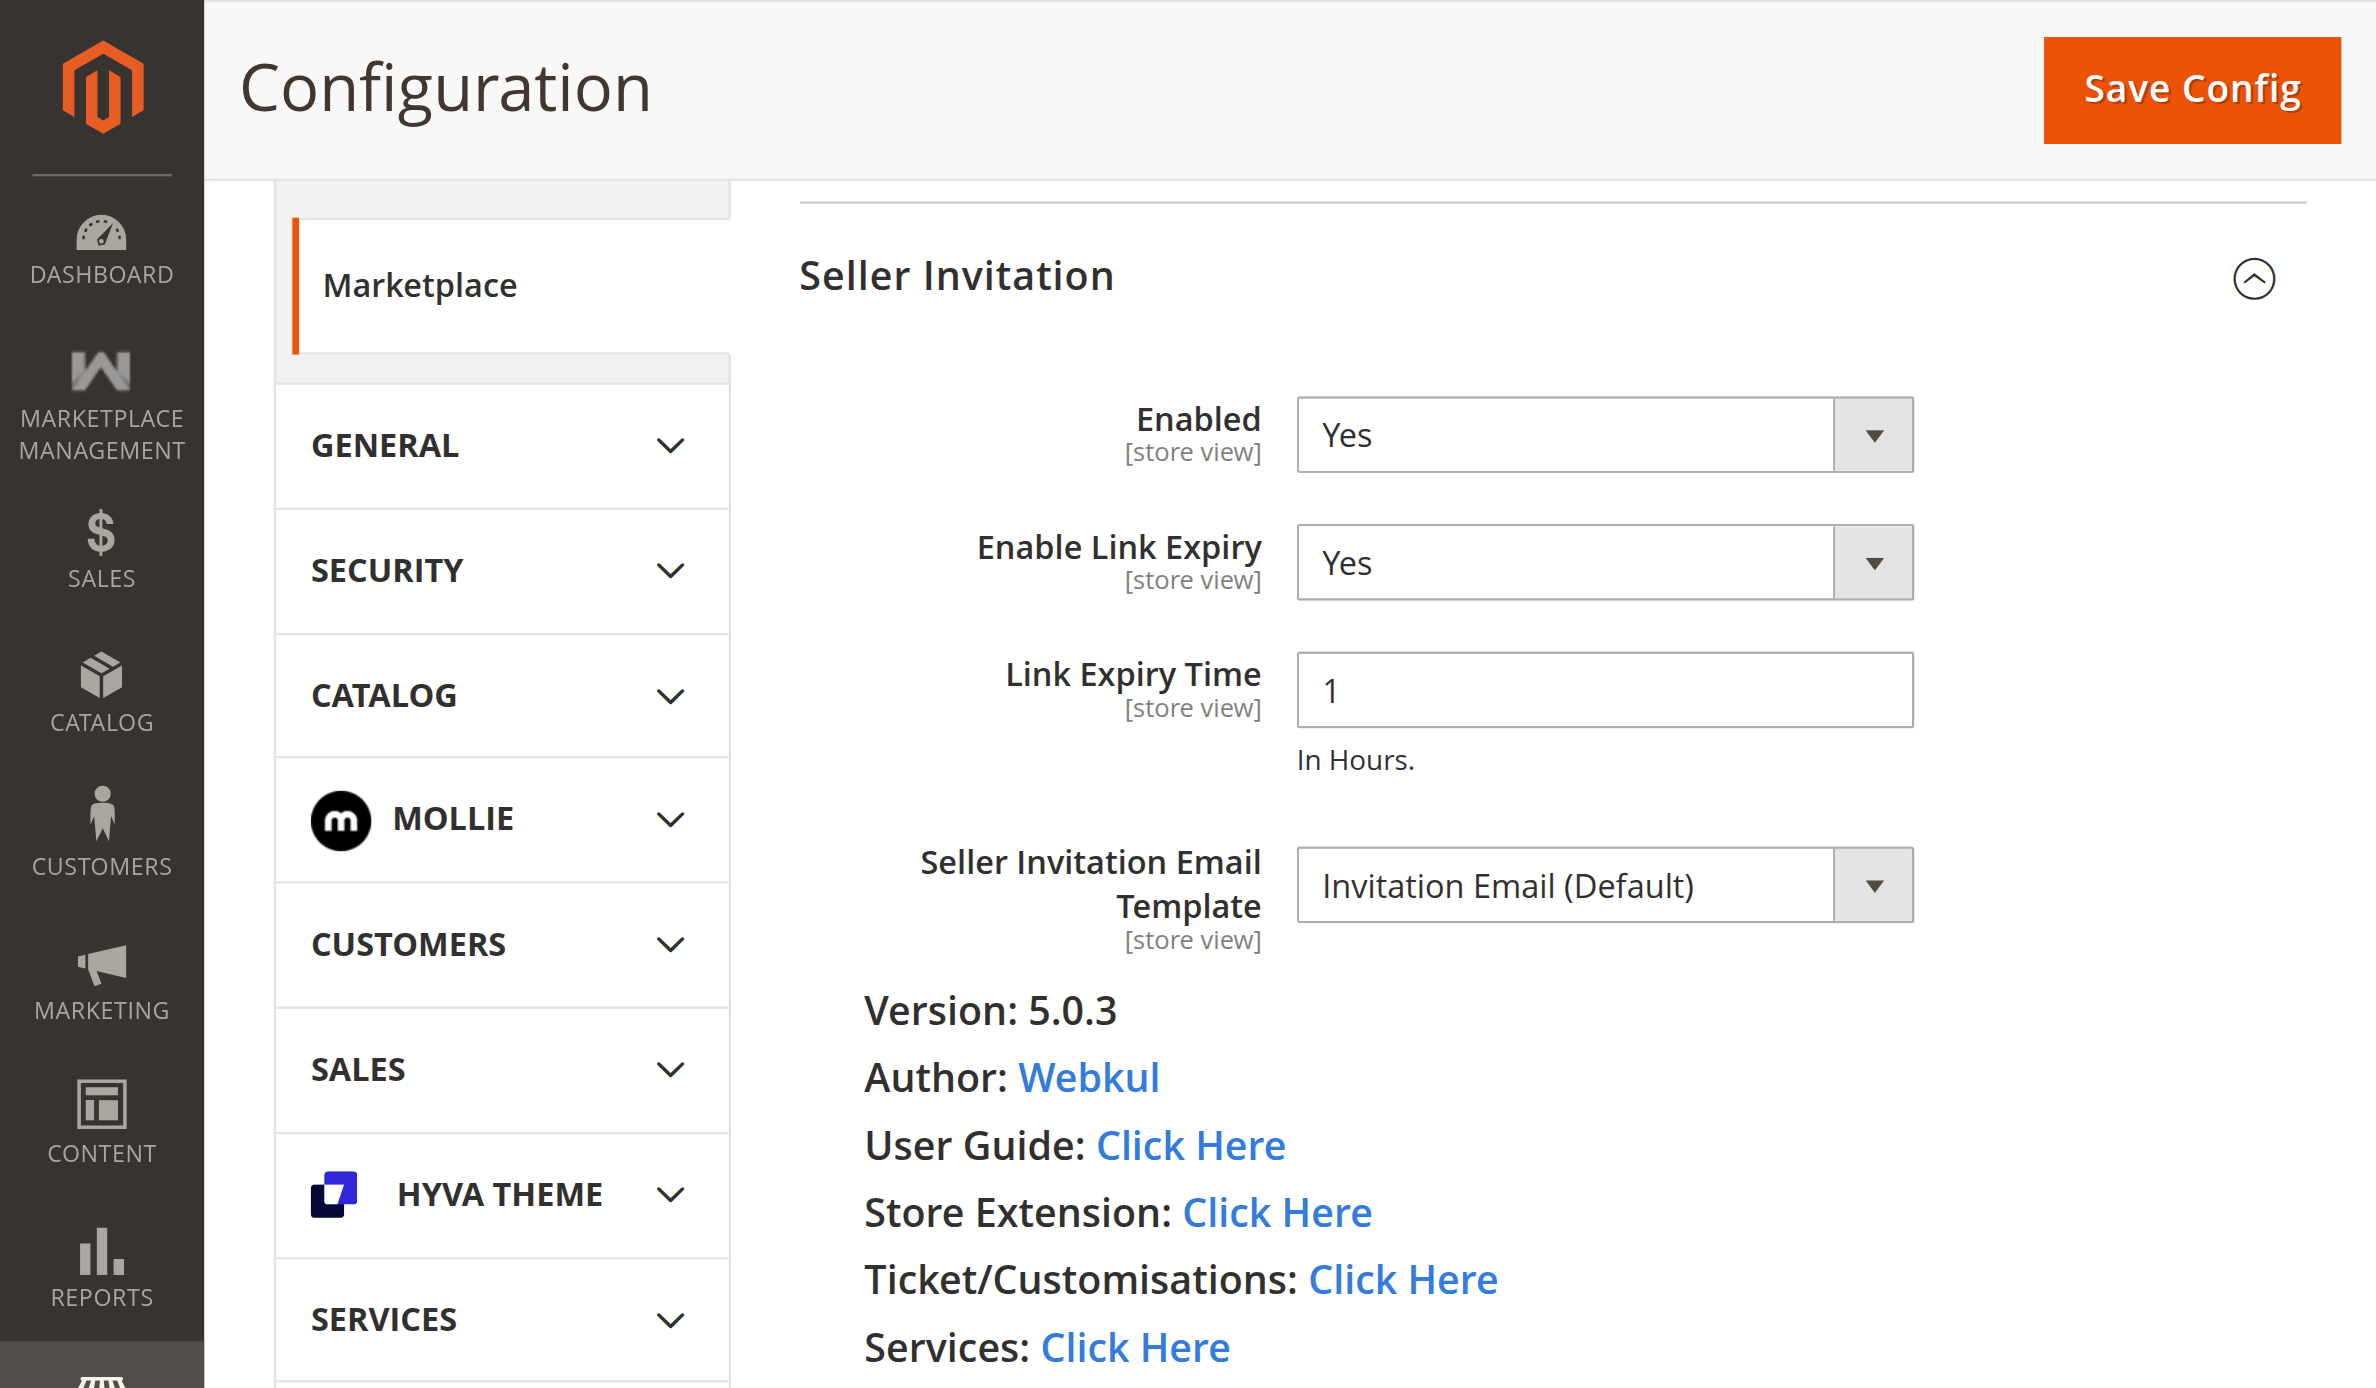
Stores > Configuration > Marketplace > Seller Invitation
Configuration Fields & Directives
The Seller Invitation configuration group contains the following settings:
| Setting Label | XML Configuration Path | Field Type | Default Value | Description |
|---|---|---|---|---|
| Enabled | marketplace/sellerinvitation/status | Dropdown (Yes/No) | No | Master toggle for the Seller Invitation module. When set to Yes, open seller registration is disabled, and only candidates with an invitation link can register as sellers. When set to No, standard open marketplace registration resumes. |
| Enable Link Expiry | marketplace/sellerinvitation/link_expiry_status | Dropdown (Yes/No) | No | Toggles whether invitation links expire after a certain number of hours. If enabled, invitations become invalid once the configured time elapses. |
| Link Expiry Time | marketplace/sellerinvitation/link_expiry | Text (Digits) | 24 | Defines the duration in Hours for which an invitation link remains valid. Visible only when Enable Link Expiry is set to Yes. |
| Seller Invitation Email Template | marketplace/sellerinvitation/email | Dropdown (Email Templates) | Default Template | Specifies the transactional email template used when sending invitations to sellers. Admins can select the built-in template or a custom template created under Marketing → Email Templates. |
| Module Version | Information Block | Read-only | Current Version | Displays the installed extension version and Webkul author credentials (Webkul\SellerInvitation\Block\Config\Source\Version). |
Detailed Field Descriptions
1. Enabled
- XML Path:
marketplace/sellerinvitation/status - Options:
Yes(1) /No(0) - Impact:
- When set to Yes:
- The admin menu item Marketplace → Seller Invitation → Invite Seller becomes active.
- The public registration page (
customer/account/create) suppresses the "Do You Want To Become A Seller / Vendor?" radio buttons. - The Become Seller customer dashboard menu verifies active invitations before allowing existing customers to request seller status.
- When set to No:
- Standard Webkul Marketplace registration is restored. Anyone can register as a seller directly.
- If a user clicks an invitation link while the module is disabled, the system displays: "Seller Invitation Paused. Please contact admin."
- When set to Yes:
2. Enable Link Expiry
- XML Path:
marketplace/sellerinvitation/link_expiry_status - Options:
Yes(1) /No(0) - Impact:
- When set to Yes:
- The system calculates an expiration timestamp for each invitation (
created_at + link_expiry hours). - The Admin Invitation Grid dynamically shows link statuses as Active or Expired.
- If a link expires, the admin is permitted to send a fresh invitation to that same email address.
- The system calculates an expiration timestamp for each invitation (
- When set to No:
- Invitation links remain valid indefinitely until used.
- Admins cannot send duplicate invitations to an email address that already has an unused invitation token.
- When set to Yes:
3. Link Expiry Time
- XML Path:
marketplace/sellerinvitation/link_expiry - Validation:
required-entry validate-digits - Units: Hours
- Default:
24(or store preference) - Impact:
- Governs the exact validity window for the invitation token.
- Example: If set to
48, an invitation sent on Monday at 10:00 AM UTC remains valid until Wednesday at 10:00 AM UTC.
4. Seller Invitation Email Template
- XML Path:
marketplace/sellerinvitation/email - Default:
marketplace_sellerinvitation_email(Webkul Seller Invitation Email Template) - Template Variables Available:
{{var name}}: Name of the invitee entered by the admin.{{var title}}: Email header / title (Seller Invitation Email!!).{{var body}}: Custom message/description entered by the admin in the invitation form.{{var inviteUrl}}: The unique invitation link or customer login URL.
Saving & Applying Configurations
- After adjusting your configuration values, click the orange Save Config button in the upper right corner.
- Flush the configuration cache using the Magento CLI:
php bin/magento cache:clean config - Or flush via the Admin Panel under System → Cache Management → Configuration.
Next Step
Learn how to create and send invitations in Sending Seller Invitations.