
Installation Guide
This guide details the two supported installation approaches for the Webkul Multi Company SaaS Extension for Magento 2:
- Method 1: Manual Installation via Webkul Store ZIP package.
- Method 2: Composer Installation via Adobe Commerce / Magento Marketplace.
Method 1: Manual Installation (Webkul Store Zip)
Step 1: Download & Extract Package
- Log in to your Webkul Store Account.
- Navigate to My Account > My Purchased Products.
- Locate Multi Company SaaS Module for Magento 2 and download the ZIP archive.
- Extract the contents on your local machine. You will find an
appfolder containing the module codebase.
Step 2: Upload Files to Server
Transfer the extracted app directory to your Magento 2 root directory on your web server via SSH, SFTP, or your deployment pipeline:
Target Directory:
<Magento_Root>/app/code/Webkul/MpSaas/
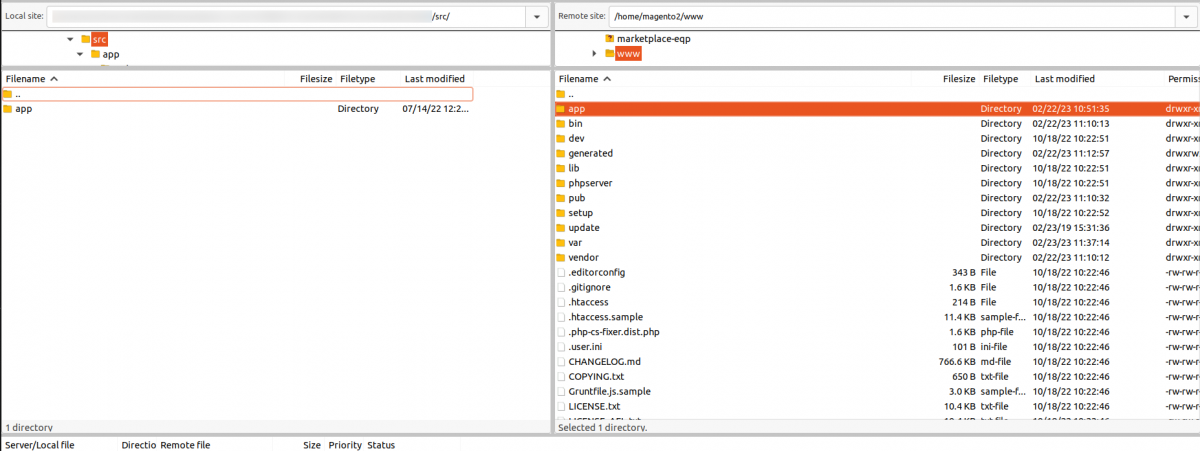 Figure 4.1: Uploading extension files into the Magento 2 root directory.
Step 3: Install Dependencies & Run Deployment Commands
Open your terminal, navigate to your Magento 2 root folder, and execute the following deployment sequence:
# 1. Require recurring payment SDKs
composer require stripe/stripe-php:~16.0.0
composer require paypal/rest-api-sdk-php:*

# 2. Run Magento setup upgrade to create database tables
php bin/magento setup:upgrade

# 3. Compile dependency injection and code generators
php bin/magento setup:di:compile

# 4. Deploy static view files
php bin/magento setup:static-content:deploy -f

# 5. Reindex and flush cache storage
php bin/magento indexer:reindex
php bin/magento cache:flush
Method 2: Composer Installation (Magento Marketplace)
If you purchased the extension through the Adobe Commerce / Magento Marketplace:
Step 1: Obtain Marketplace Access Keys
- Log in to your Adobe Commerce Marketplace account.
- Go to My Profile > My Products > Access Keys.
- Copy your Public Key (username) and Private Key (password).
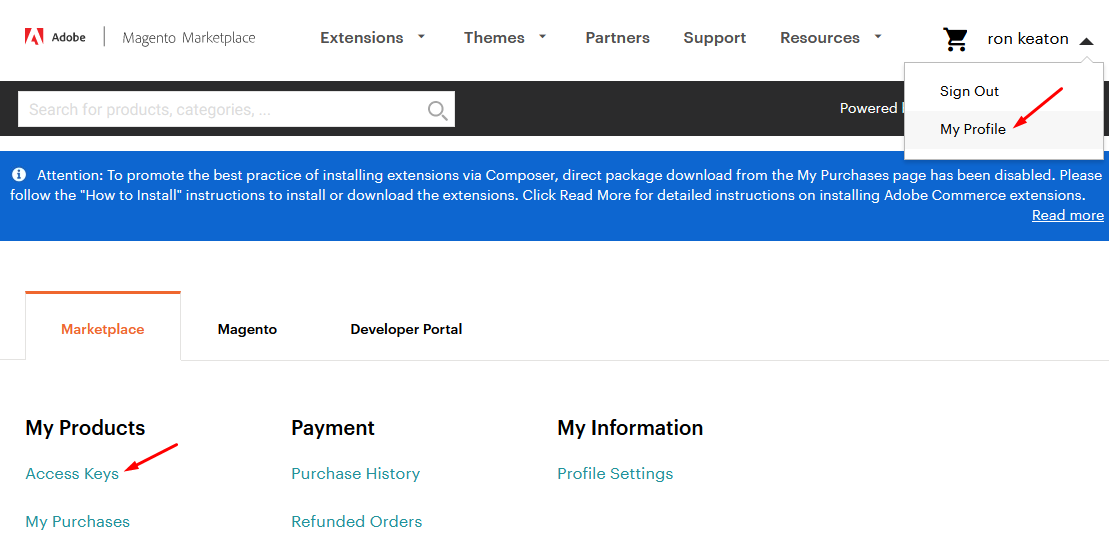 Figure 4.2: Accessing the Access Keys tab in the Adobe Commerce Marketplace profile.
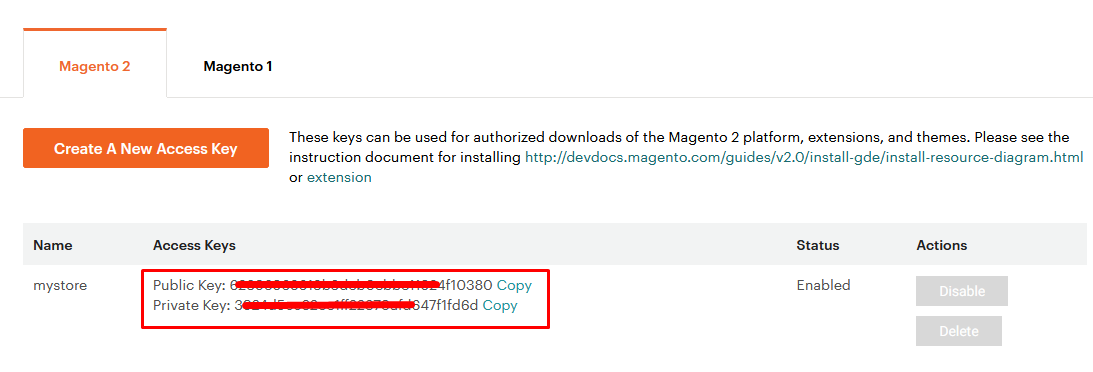 Figure 4.3: Copying Public and Private access keys.
- If you have not created access keys yet, click Create A New Access Key, enter an identifier, and generate the key pair.
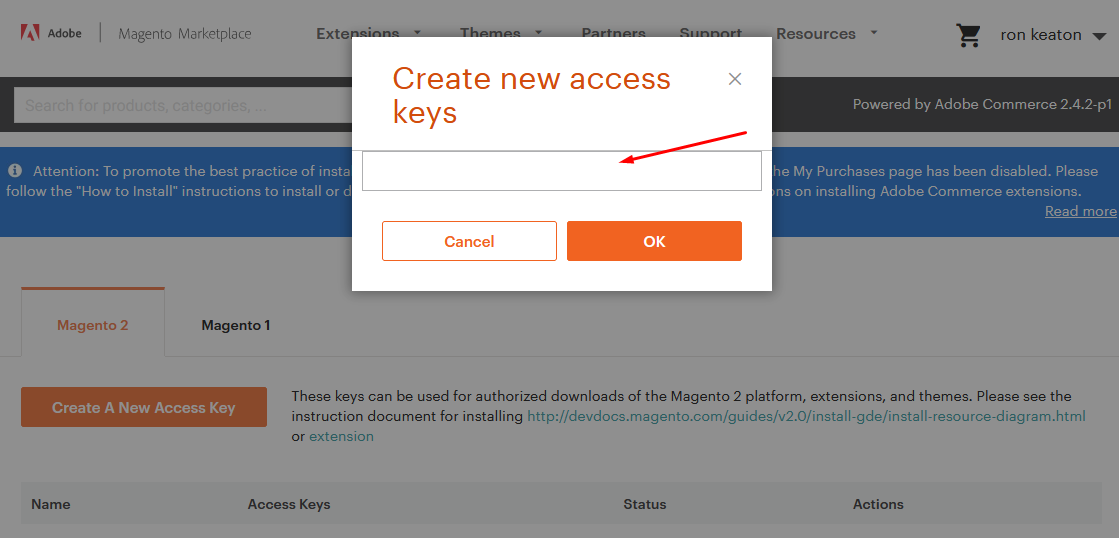 Figure 4.4: Creating a new access key pair.
Step 2: Require the Package via Composer
Run the following command in your Magento 2 root directory:
composer require webkul/multi-company-saas-module:5.0.4
When prompted for authentication credentials:
- Username: Your Marketplace Public Key
- Password: Your Marketplace Private Key
Step 3: Finalize Installation & Deployment
Run the required SDK installations and standard deployment commands:
# 1. Install recurring payment SDKs
composer require stripe/stripe-php:~16.0.0
composer require paypal/rest-api-sdk-php:*

# 2. Upgrade database schema
php bin/magento setup:upgrade

# 3. Compile code
php bin/magento setup:di:compile

# 4. Deploy static assets
php bin/magento setup:static-content:deploy -f

# 5. Reindex and flush cache
php bin/magento indexer:reindex
php bin/magento cache:flush
Verification & Status Check
Confirm that the module is enabled and recognized by Magento:
php bin/magento module:status Webkul_MpSaas
The terminal should output:
Module is enabled
In the Magento Admin Panel, confirm that:
- Marketplace Management displays the Saas Configuration sub-menu.
- Stores > Settings > Configuration > Webkul includes SAAS Configuration.