
Building the Menu
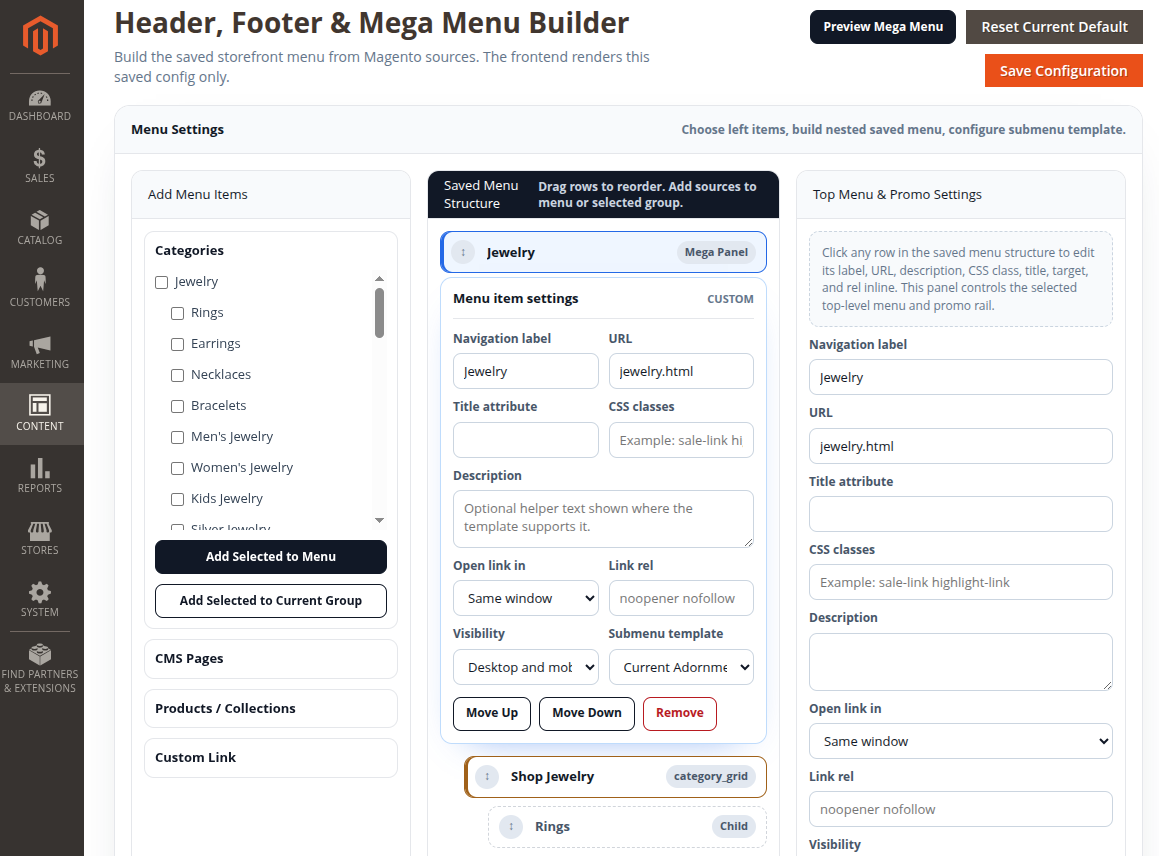
The menu builder has three main areas: menu sources on the left, the saved menu tree in the middle, and item settings on the right.
1. Add sources
Expand a source group and select items, then add them to the menu:
- Categories — your catalog categories.
- CMS Pages — static pages, such as About and Contact.
- Products / Collections — individual products or collection links.
- Custom Link — enter a Label and URL (e.g.
jewelry/gift-collections.html).
Two buttons per source:
- Add Selected to Menu — appends to the top level.
- Add Selected to Current Group — nests under the currently selected group (used to build mega-menu columns).
2. Structure the tree
The Saved Menu Structure is a drag-and-drop tree:
- Drag rows to reorder top-level items.
- Drop an item onto another to nest it (build mega-menu columns/groups).
- Use Move Menu Up / Down to reposition the selected top-level item.
3. Edit an item
Click any row to load it into the right-hand settings panel:
| Field | Purpose |
|---|---|
| Navigation label | Text shown in the menu |
| URL | Page or website link |
| Title attribute | Optional tooltip text |
| Description | Shown in some submenu templates |
| Open link in | Same window or new tab |
| Visibility | Desktop and mobile / Desktop only / Mobile only |
| Submenu template | See Submenu Templates |
| Right Promo Images | Two promo images for the mega menu panel |
Saving & resetting
- Save Configuration updates the live storefront menu.
- Reset Current Default restores the default menu setup.
- Preview Mega Menu opens a preview before saving.