
Installation
Installing the Magento 2 Marketplace Restrict Vendor Product module is a straightforward process. Please follow the steps below to successfully install and prepare the module for use.
Option A — Install from Zip Package
Use this method if you downloaded the module package directly from the Webkul Store.
1. Download Module
Log in to your Webkul Store account, navigate to My Account > My Purchased Products, and then download and extract the contents of the module zip folder on your local system.
2. Upload Folder
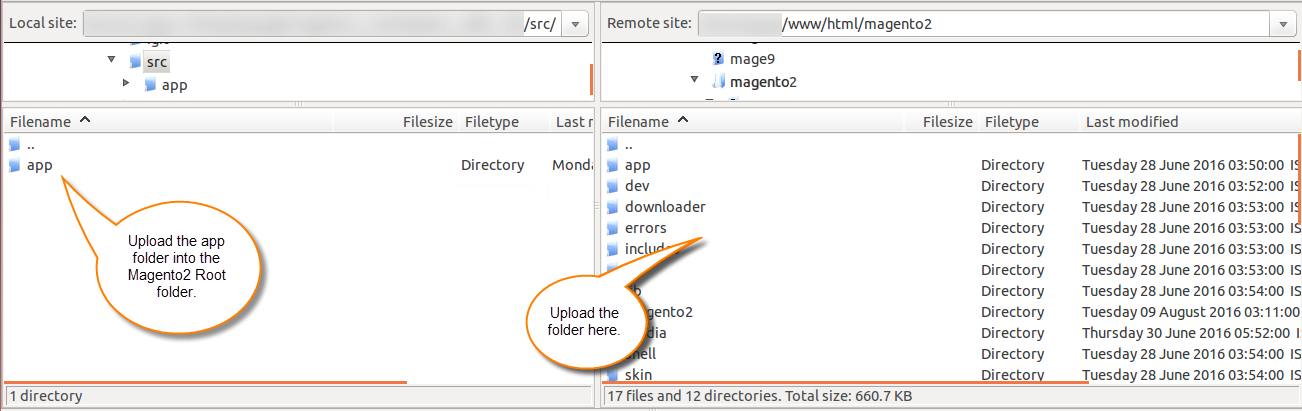
Once the module zip is extracted, navigate to src/app. Connect to your server via SSH/SFTP. Copy the app folder and upload it into your Magento 2 root directory on the server. The files should reside under app/code/Webkul/RestrictVendorProduct/.
3. Run Commands
Run the following commands in sequence in the Magento 2 root directory to compile, deploy, and clear the cache:
php bin/magento setup:upgrade
php bin/magento setup:di:compile
php bin/magento setup:static-content:deploy
php bin/magento indexer:reindex
php bin/magento cache:flush
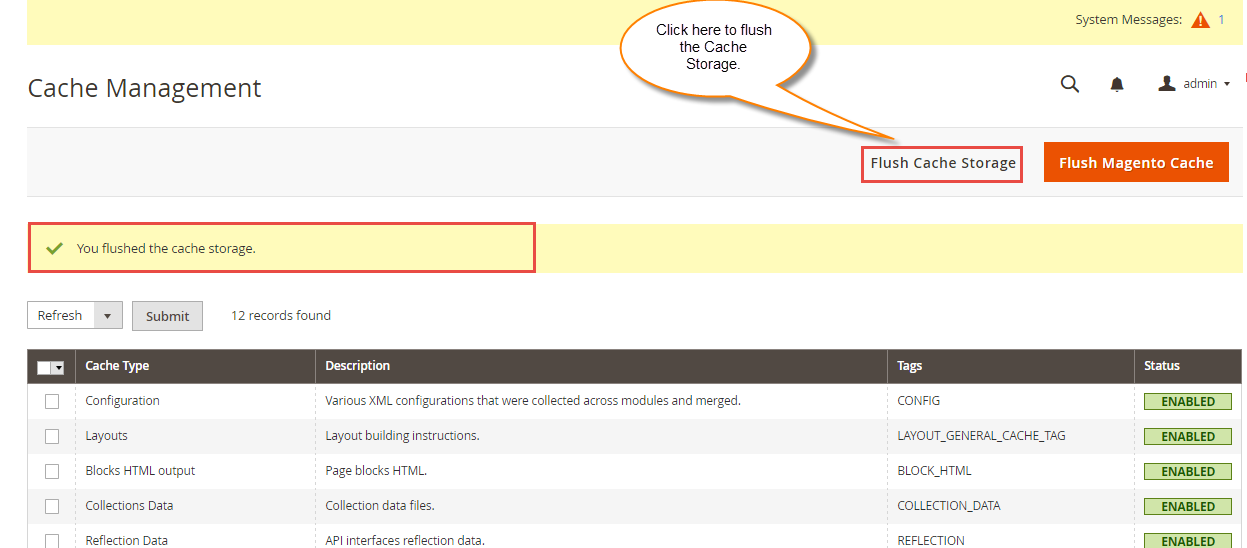
You can also use the admin panel to clear the cache. Navigate to System -> Tools -> Cache Management and click the Flush Magento Cache button.
Option B — Install with Composer
Use this method if the module package is available in your Composer repository.
You need to add the provided access keys during purchase. After that, run the Composer require command to install the package:
composer require webkul/module-restrict-vendor-product
After that, you need to run the installation commands provided in Option A > 3. Run Commands.
Language Translation
The module supports multiple languages, including both RTL (Right-to-Left) and LTR (Left-to-Right) layouts. To translate the module into another language, such as German:
Navigate to the module's i18n directory:
app/code/Webkul/RestrictVendorProduct/i18n(or the equivalent path in your installation).Edit the
en_US.csvfile.Rename the CSV file to match your target locale, for example,
de_DE.csvfor German.Translate all content on the right side of the comma into your target language.
Save the file.
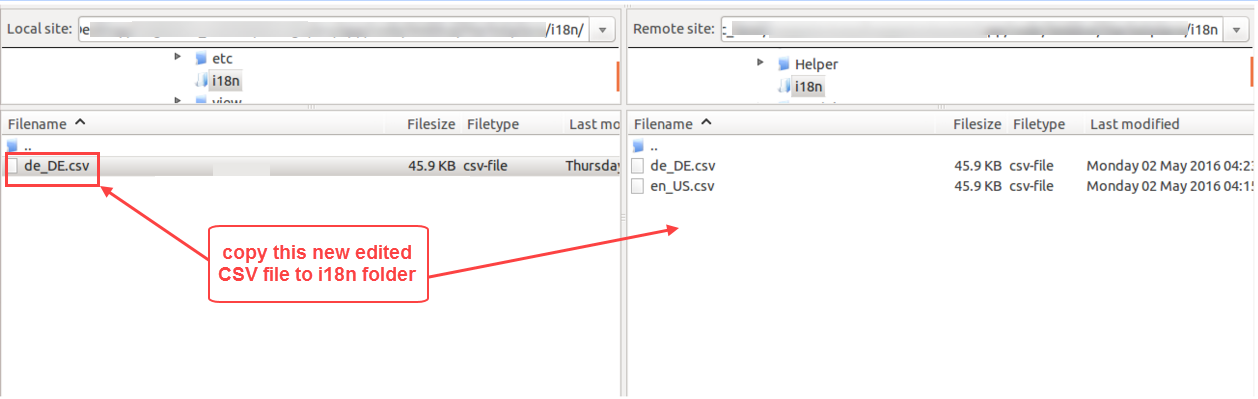
Upload the translated CSV file to the
app/code/Webkul/RestrictVendorProduct/i18npath on your server.
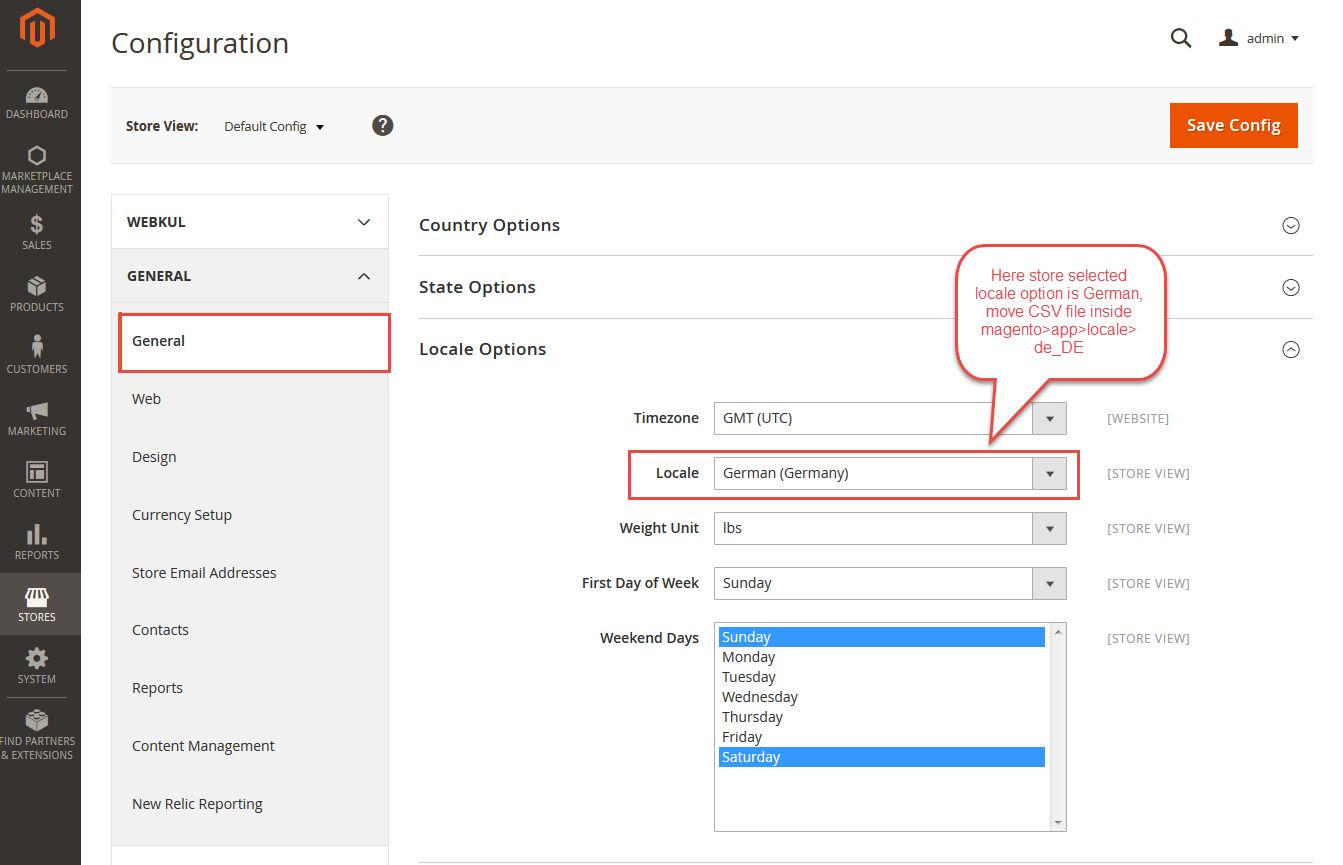
- Navigate to your Adobe Commerce Cloud admin panel, go to Store -> Configuration -> General -> Locale Options and select your desired locale.
- Run the static content deployment and cache flush commands again.
The module will now be translated into your selected language.
Translation Note
Always ensure that the structure of the CSV (the English key on the left) remains unmodified. Only change the translated string on the right side.